
Contents
Popularly know as buddy boxing or a buddy box setup where an experienced flyer helps a novice flyer to learn to fly their aircraft. The instructor’s transmitter connects to the plane and the student’s transmitter connects to the instructor’s. The instructor can pass control back and forth between the instructor’s and student’s transmitters.
When using the same brand of transmitters to buddy box the setup is usually fairly easy. When using different brands of transmitters often this is not easily achieved or may not even be possible. The student’s transmitter outputs the controls using a channel order that may differ from the instructor’s transmitter channel order. The servo direction and throw amounts may be different. With OpenTX, on this screen these differences can all be accounted for and configurations made so that the two transmitters are compatible for use during buddy boxing.
Student Tx ⇒ Channels ⇒ Instructor Tx ⇒ Channels ⇒ Aircraft Rx
Student Tx ⇒ RETA ⇒ Trainer Tx ⇒ AETR ⇒ Aircraft Rx
Settings

Trainer Screen when model menu setup screen trainer option is set to master.
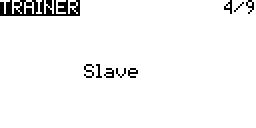
Trainer Screen when model menu setup screen trainer option is set to slave. More…
Sticks (Row Name)
![]() The stick on this transmitter (instructor) that will be replaced by a source channel from the student’s transmitter.
The stick on this transmitter (instructor) that will be replaced by a source channel from the student’s transmitter.
Mode
The way in which the student’s transmitter will replace the sticks.
 Instructor’s stick will continue to be used.
 Will add the values from both the instructor’s stick and student’s transmitter.
 Will replace the instructor’s stick value with the student’s transmitter.
Weight
![]() The amount of travel to use from the student’s transmitter. The range is from -125% to 125%. Use negative to change throw direction.
The amount of travel to use from the student’s transmitter. The range is from -125% to 125%. Use negative to change throw direction.
Source
![]() The channel from the student’s transmitter that carries the equivalent stick values.
The channel from the student’s transmitter that carries the equivalent stick values.
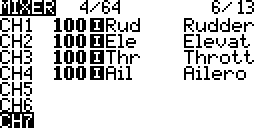
Example One
Student Output
CH1 – Rudder
CH2 – Elevator
CH3 – Throttle
CH4 – Aileron
Instructor Trainer Source
Rudder – CH1
Elevator – CH2
Throttle – CH3
Aileron – CH4

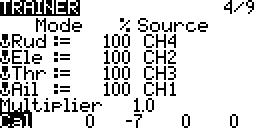
Example Two
Student Output
CH1 – Throttle
CH2 – Aileron
CH3 – Elevator
CH4 – Rudder
Instructor Trainer Source
Rudder – CH4
Elevator – CH3
Throttle – CH1
Aileron – CH2
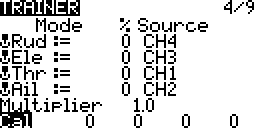
Multiplier
This value changes the weight for all the sticks together. The range is from 1.0 to 5.0.
Cal (Calibrate)
This is used to calibrate the centre value of the student’s transmitter.
- Centre the sticks and trims on the student’s transmitter
Make sure throttle is centred as well
- Select Cal and Long Press ENTER
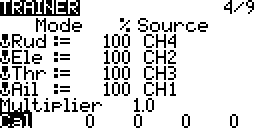
The numbers after Cal may be different for your transmitter.
Trim
The trim from the instructor’s transmitter is usually used.
Set the trims on the student’s transmitter to their centres.
This behaviour takes place when the Mixes map the Inputs to the channels.
Note the ![]() image indicating that the stick inputs are being used. The stick inputs usually have trims configured on Rudder, Elevator and Aileron.
image indicating that the stick inputs are being used. The stick inputs usually have trims configured on Rudder, Elevator and Aileron.
Instructor Stick Source + Instructor Trim ⇒ Inputs ⇒ Mixer ⇒ Outputs
Student Channel Source + Instructor Trim ⇒ Inputs ⇒ Mixer ⇒ Outputs
If trims on the student’s transmitter are used they get added to the stick value coming out of it. This may cause the aircraft to go “out of trim”. If the sticks are centred on the instructor’s transmitter the plane may fly level and straight. Now if the control is passed to the student’s transmitter the plane may not fly level and straight even if the student’s sticks are centred if the students has trims that are not centred.
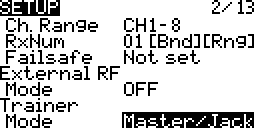
Instructor vs. Student Transmitter
Transmitter’s Role
Assigning the transmitter to be the instructor or the student is done on the model menu SETUP screen. More…
When an OpenTX transmitter is set up as a slave no further configurations are required. Turn on the transmitter, select a model and connect the trainer cable. A simple trainer model is recommended and can be created and setup using the model menu model select screen. More…
When an OpenTX transmitter is set up as a master follow the documentation on this page.
Binding
The instructor’s transmitter is the one that gets bound to the receiver.
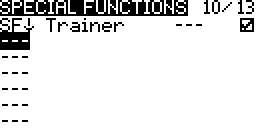
Instructor vs. Student Control
Configuring transferring control from the instructor to the student is done on the model menu SPECIAL FUNCTIONS screen. More…
When the switch position is changed control is transferred back and forth between the instructor’s and student’s transmitters. Usually a momentary switch is used and set so that when it is held in position the student’s transmitter has control and when it is released the instructor’s transmitter has control.
Wired Connection
Connect a cable to the trainer jack on the student’s and instructor transmitters.
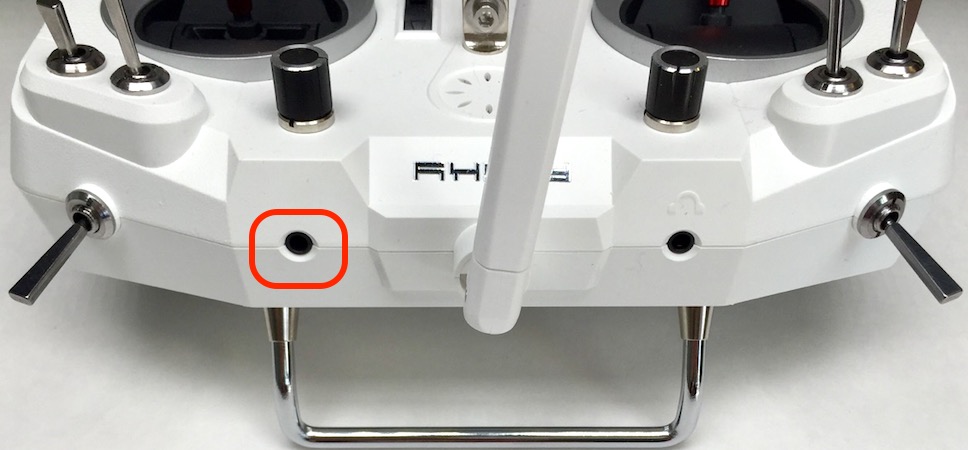
Taranis X7 Series Trainer Jack
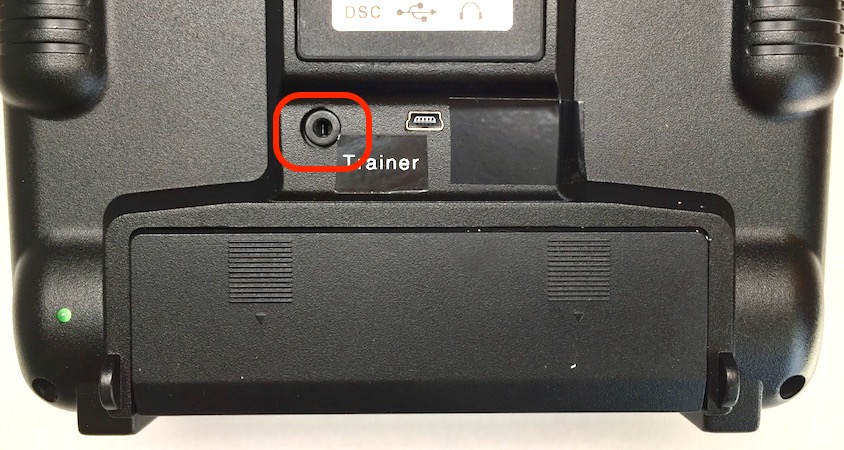
Taranis X9 Series Trainer Jack
FrSKY transmitters can use cables with a standard 3.5mm mono or stereo connector. When connecting to a transmitter running OpenTX always turn it on using it’s power switch. The instructor vs. student status is determined in software.
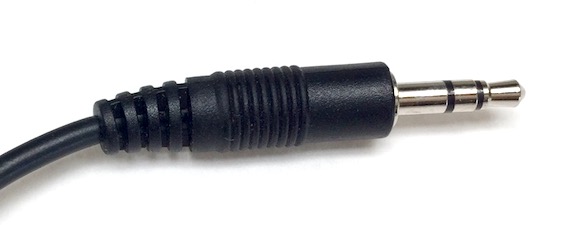
3.5mm Stereo Connector
Spektrum transmitters use a standard 3.5mm mono connector. When connecting to a Spektrum transmitter use it as the student’s transmitter. Keep it turned off. Plug in the cable and it turns on in student mode.
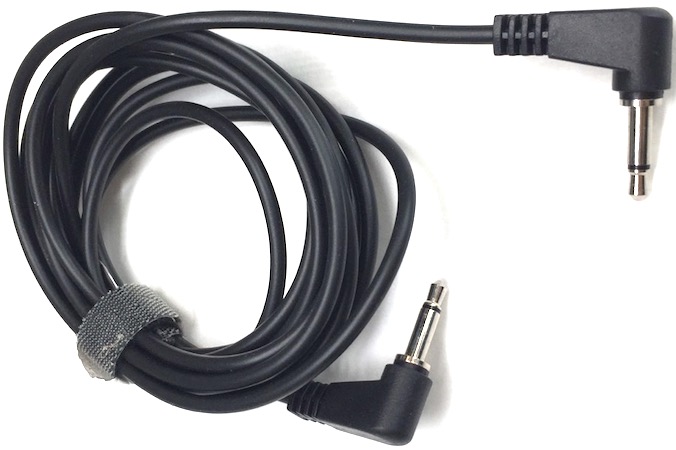
Trainer Cable With 3.5mm Mono Connectors
Pre Flight Checks
Propeller
Perform all preflight checks with the propeller removed.
Range Check
Performed using the instructor’s transmitter. More…
- Place the transmitter into range check mode.
- Move the transmitter at least 30 to 40 paces away (75-100 feet, 22-30 meters) from the aircraft.
- Ensure that there is no possibility that the propeller could hurt someone.
- Move the sticks and check if the servos move.
- If there is a problem check and correct the problem. Perform the range check again.
- Connections
- Battery voltage
- Antenna orientation
- Sources of radio interference such as carbon fibre on the aircraft
Channel & Stick Mapping
First performed on the instructor’s transmitter.
- Move the sticks and check that the correct servos move.
- If corrections are required make them on the model menu MIXER screen. More…
Pass control to the student’s transmitter.
- Move the sticks and check that the correct servos move.
- If the corrections are required make them on the radio menu TRAINER screen. More…
- Check the source for each stick.
Servo Direction
First performed using the instructor’s transmitter.
- Check servo directions.
- If corrections are required make them using the model menu OUTPUTS screen. More…
- Change the direction setting.
Pass control to the student’s transmitter.
- Check servo directions again.
- If corrections are required make them on the student’s transmitter or using the radio menu TRAINER screen. More…
- Change the weights to positive or negative.
Trim
First performed on the instructor’s transmitter.
On the student’s transmitter set trims to their centre.
Centre Calibration
First perform the trim steps.
Pass control to the students transmitter.
- Centre the sticks on the student’s transmitter except for throttle which must be all the way down.
- Check the positions of the servos.
- Pass control back and forth between the instructor and student’s transmitters.
- The servos must not move.
- If corrections are required make them using the radio menu TRAINER screen. More…
- Use the calibrate setting.
Servo Travel Amount
First performed using the instructor’s transmitter.
- Check servo travel amount by moving sticks to 100% of their travel. Check if servo travel is being restricted.
- If corrections are required make them using the model menu OUTPUTS screen. More…
- Change the minimum and or maximum limits.
Pass control to the student’s transmitter.
- Check servo travel again.
- The servos must travel the same amount as they did with control using the instructor’s transmitter.
- Move corresponding instructor and student transmitter sticks to their travel limits one at a time.
- Pass control back and forth between the instructor and student’s transmitter.
- Check that the servo travel is the same.
- If corrections are required make them on the student’s transmitter or using the radio menu TRAINER screen. More…
- If individual servos have differing travel amounts then correct them by using weights setting.
- If all the servos differ by the same amount then correct them by using the multiplier setting.