
Contents
- Download and install OpenTX Transmitter Firmware
- Simulate transmitters and models (Try before you buy or fly)
- Edit real or simulated transmitter and model configurations
- Backup the transmitter’s firmware, models and SD Card contents
- Change the OpenTX transmitter start up screen (splash screen)
Download Companion
Download Companion from the OpenTX website > Downloads
Select the most recent version at the top of the page
- OpenTX 2.2.0 (2017-05-30) or more recent
Please read the documentation on the page before downloading companion using the links at the bottom of that page.
Windows, macOS, Linux
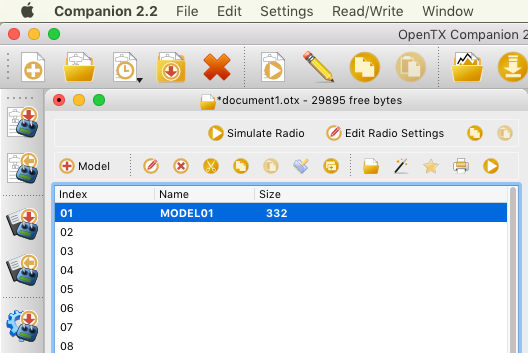
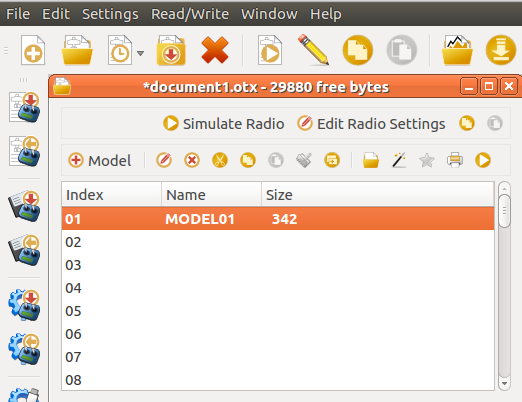
Companion is available for Windows, macOS and Linux (Debian & Ubuntu) PC operating systems. The features and user interface is almost identical on all these platforms. This website primarily uses macOS screenshots with screenshots from other operating systems included when there are differences.
Basic concepts
Transmitter & Radio
In OpenTX the words transmitter and radio have been used interchangeably. Tx & TX are short forms of the word transmitter.
Companion’s Main Tasks
While Companion has a number of features it handles two main tasks:
- Downloading new OpenTX firmware files and writing them to the transmitter
- Managing transmitter settings and model configurations
Information Storage & Memory Types
OpenTX stores information in the following ways:
- Flash memory where the transmitter’s firmware or “operating system” are stored. “Flashing the transmitter” means replacing the firmware. Flashing the transmitter allows you to upgrade to a newer version or to change the menu language. Models and settings are not affected when flashing the firmware.
- EEPROM memory is where the transmitter and model settings are stored. Reading and writing to it allows backing up and editing in Companion. Do not try and write to this drive directly.
- SD Card memory is optional; This is where the sounds, announcements, images, wizards, logs and lua scripts are stored.
File Types
Companion handles different types of files:
- Firmware.bin files which are non-editable and can be written to or copied from the transmitter. These files contain the transmitter’s operating system.
- EEPROM.bin files which can be edited, written to and read from the transmitter. These files contain the transmitter and model settings. An EEPROM.bin file, when on the computer, is a direct copy from the transmitter to the computer by companion.
- EEPROM.otx files (otx files) are similar to the EEPROM.bin files but have been processed by Companion.
Radio vs. Model Settings
Settings are grouped under two different sections in OpenTX as follows:
- Radio Settings relate to the transmitter and the firmware running on the transmitter.
- They are independent of the model being used.
- Some examples are date, time, language and calibration.
- Model Settings relate to the model being used.
- Each model has its own settings independent of other models.
- Some examples are receivers bound, timers, sensors and mixes.
Launching Companion For The First Time
When companion is launched for the first time a window is displayed to guide you along the initial steps.
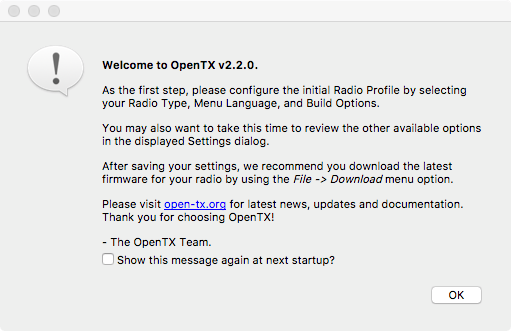
On first launch the settings window is also displayed.
Companion Settings
Companion settings is where the transmitter hardware, firmware options, application and simulator settings are configured.
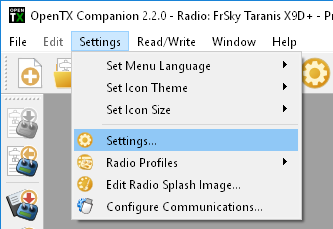
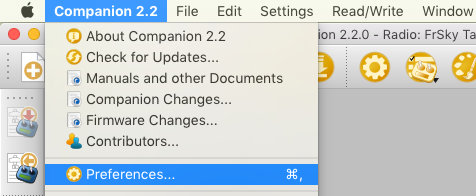
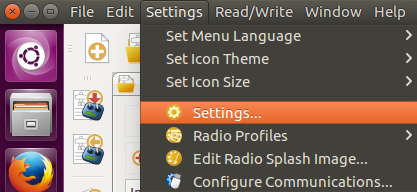
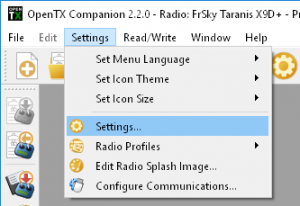
Open the Edit Settings window in one of the following ways:
- Windows: Settings -> Settings
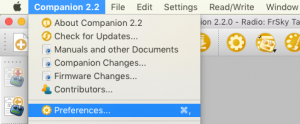
- macOS: Companion 2.2 -> Preferences
- Linux: Settings -> Settings
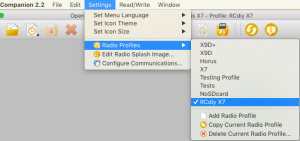
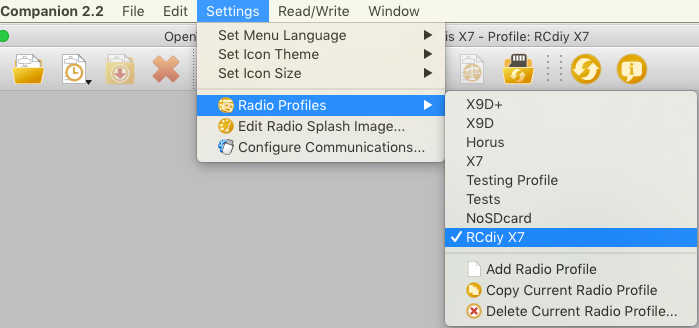
Transmitter Profile (Build Options)
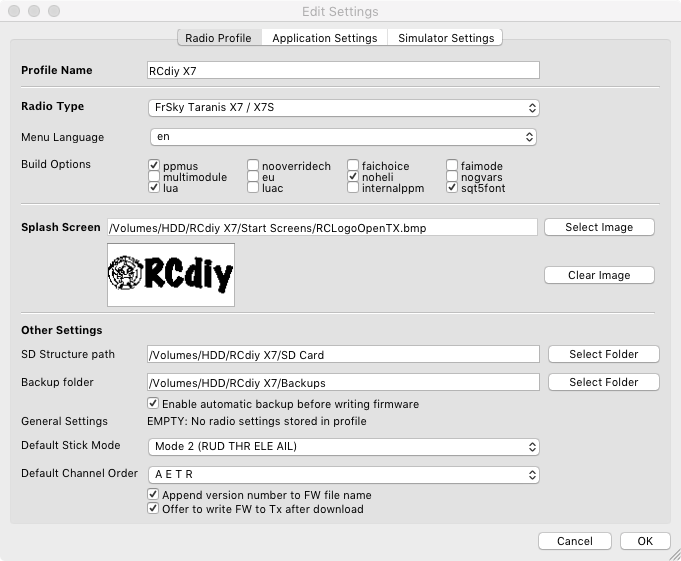
Companion can be used to configure more than one transmitter. Each transmitter can be given its own profile corresponding to its firmware, hardware, configurations and calibration.
- Profile Name: This name appears in the Settings -> Radio Profile menu
- Radio Type: Choose the transmitter hardware being configured.
- Menu Language: Language you want the menus for the transmitter to display in.
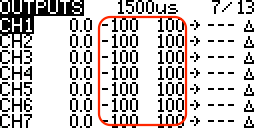
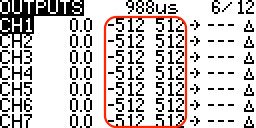
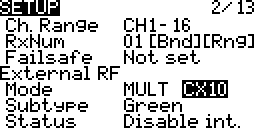
- Build Options: Select the firmware options desired. For these options to be effective the firmware has to be downloaded and flashed to the transmitter. These build options are for the Taranis transmitter but may applicable to others as well.
- ppmus – Displays channel values in microseconds instead of values from -100% to 100%
- nooverridech – Removes channel output override function. Channel overide functions are use to set channel outputs to specific values ignoring the values coming from the mixers.
- faichoice – Adds a menu entry on the transmitter’s radio setup screen to enable Federation Aeronautique Internationale (FAI) mode. Allows you to train on contest day with telemetry, then turn FAI mode on
- faimode – Disables all telemetry displays, other than RSSI and voltage, to comply with FAI regulations for contests, championships, and record setting activities. Once engaged, this option remains in effect until the firmware is re-flashed
- multimodule – Adds support for the external DIY Multiprotocol Tx Module
- eu – Removes the D8 FrSKY protocols that is illegal in Europe after Jan 1st, 2015
Note: For FrSKY transmitters the XJT module also needs to be flashed with its EU firmware to be EU compliant. FrSKY receivers will also need to be flashed with their EU firmware. This is usually only required for purchases made from stores outside the EU. If you are in the EU and have binding trouble then the likely solution is to ensure both the XJT module and receivers have the latest EU firmware. EU firmware files will have either EU or LBT in their file names. E.g. XJT_EU170317.frk. Non EU firmware files will have either NONEU or FCC in their file names. E.g. XJT_NONEU170317.frk.
XJT Firmware. Flashing Instructions. - noheli – Removes the Heli Cyclic Collective Pitch Mixer menu page
- nogvars – Disables global variable support and the associated menu page
- lua – Shows the Lua custom scripts page needed for mixes/mixer scripts.
Note: Support for other Lua scripts are always enabled - luac – Adds support for precompiled lua scripts
- cli – Connecting the USB cable enables access to the Command Line Interface
- internalppm: This enables support for generic PPM modules that have been used to replace the Taranis internal XJT module. This is not needed for most users
- sqt5font – An alternative display font

Default font on the left SQT5 on the right
- ppmus – Displays channel values in microseconds instead of values from -100% to 100%
- Splash screen: Select an image to use as the splash screen. The image that is displayed when powering on the transmitter. This image may be changed. More…
- SD structure path: For transmitter with SD cards this lets you choose a folder on your hard drive where you have made a copy of what is on the SD card of the transmitter. This allows companion to access images, sounds and lua scripts when configuring models and using the simulator
- Backup Folder: Location of backup eeproms/model settings on the computer
- General Settings: Settings such as the calibration settings. If available the date and time it was stored is shown.
- Default Stick mode: Set which sticks and directions control throttle, rudder, ailerons and elevator
Mode 1 (throttle on the right) and mode 2 (throttle on the left) are the most commonlys used settings - Default Channel Order: The channel order for when models are created
E.g. RETA: CH1 Rudder, CH2 Elevator, CH3 Throttle, CH4 Ailerons - Append version number to FW file name: When downloading a firmware file, its name includes the selected options. If this box is checked, the version number will be appended to the filename
E.g. ppmus-noheli-lua-en-2.2.0.bin - Offer to write FW to TX after download: After a firmware is downloaded Companion will display a window to write the firmware to the transmitter
Application Settings
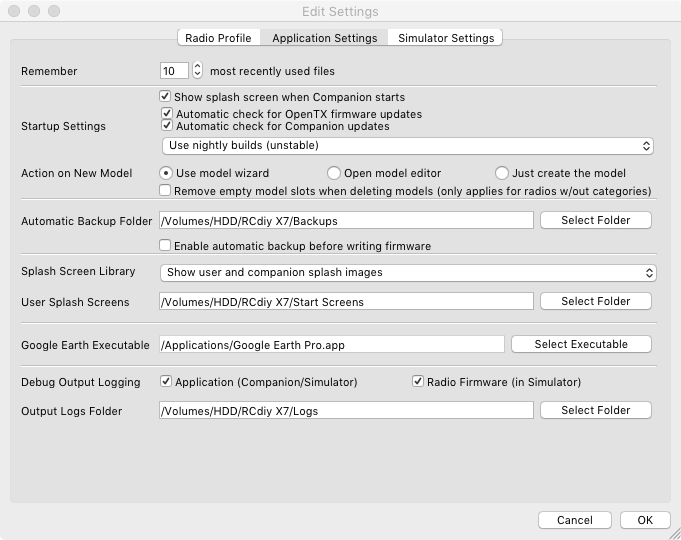
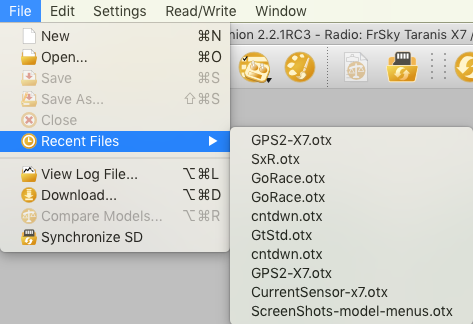
- Remember – Number of firmware files to remember in recent files
- Startup Settings
- Show Companion splash screen when Companion starts

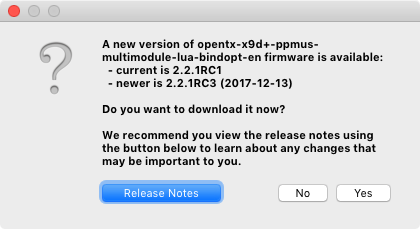
- Automatic check for OpenTX firmware updates and show a window when the most recent update has not been downloaded yet

- Automatic check for Companion updates and show a window when the most recent update has not been downloaded yet
- Download Source
- Use releases (stable) – Tried and tested by the developers and early adopter users
- Use releases and release candidates (testing) – Release candidates (RC) are for early adopters to provide feedback to the developers
- Use nightly builds (unstable) – Not to be used to fly with. The developers use this for changes and testing of the code.
- Show Companion splash screen when Companion starts
- Action on New Model
- Use model wizard when making a new model in Companion
- Open model editor when making a new model in Companion
- Just create the model and neither the model wizard nor editor get opened
- Remove empty model slots when deleting models
- Use model wizard when making a new model in Companion
- Automatic Backup Folder – Location on the computer for backup file containing radio and model settings to be written.
- Enable writing automatic backup before writing firmware is useful if for some reason the model settings get corrupted and you want to roll back changes.
- Splash Screen Library – Library of images that get displayed when the transmitter is turned on. One of these images can be used as the firmware start screen. More images Taranis X9 Series, Taranis X7 Series

- User Splash Screens – Custom firmware splash screens can be used. More…
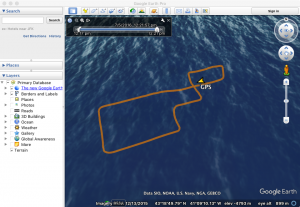
- Google Earth Executable – This is used to display GPS tracks from OpenTX log files.
- Debug Output Logging
- Application (Companion/Simulator)
- Radio Firmware (in Simulator) – Log file is written when the simulator is launched.


Simulator Settings
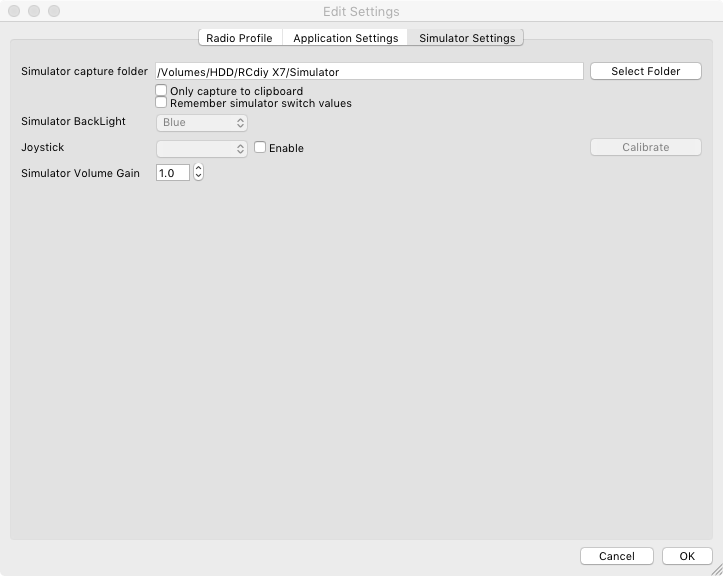
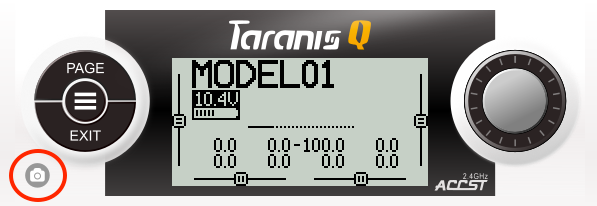
- Simulator Capture folder is where the LCD screen shots taken by clicking on the camera icon are placed.
- Remember simulator switch values – When enabled the simulator switch and know/slider positions are retained when the simulator is closed and launched again.
- Simulator Backlight – When available depending on transmitter hardware the colour of the LCD backlight can be selected.
- Joystick – When a joystick (or an OpenTX transmitter in joystick mode) is connected the simulator sticks can be moved using the joystick.

Transmitter And SD Card Read & Write
Connecting The Transmitter In Boot Loader Mode
Most new transmitter such as the Taranis series do not require any additional software or drivers to be installed on the computer. One exception is the FrSKY Horus X12S which is covered in this forum thread.
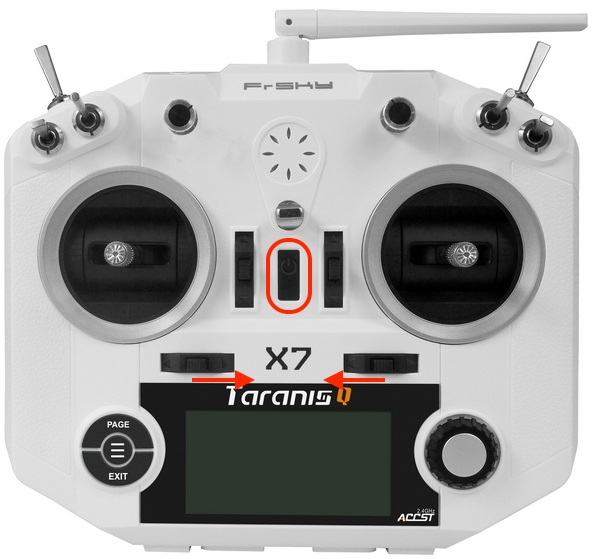
- Turn off the transmitter
- Pull the two horizontal trims towards the centre
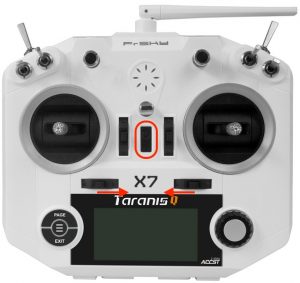
- Turn on the transmitter
- Release the trims
- Connect a USB cable from the computer to the transmitter
- The screen will display “USB Connected”
- Wait for two drives to show up/mount (This could take up to a minute)
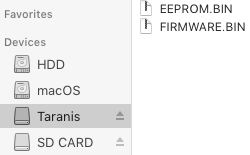

- Taranis Drive: This has two .bin files. Do not try and access these files directly.
- SD Card Drive: This may be empty or have files and folders with sounds and announcements, images, lua scripts and log files.
Disconnecting The Transmitter
Before disconnecting the USB cable eject the two mounted drives. This step is important to reduce the chances of data/file corruption.
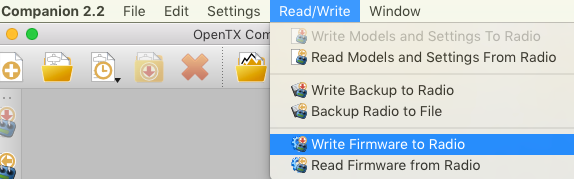
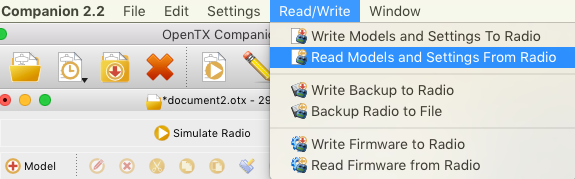
Read/Write Menu
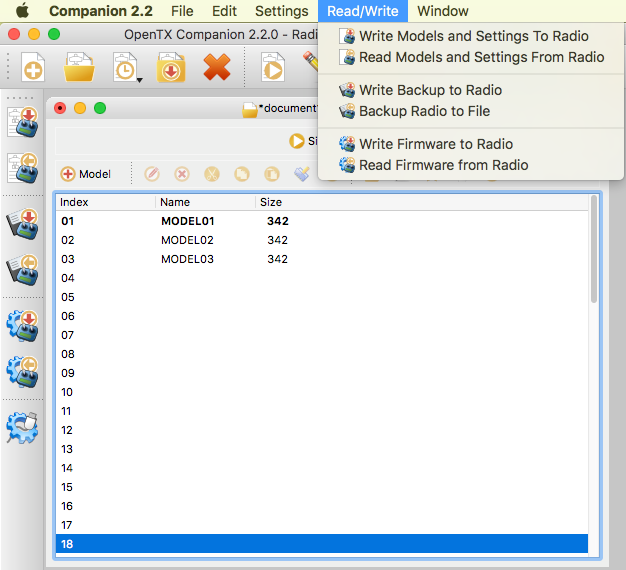
Memory operations to/from the transmitter are handled by the different entries in the “Read/Write” menu:
- Read Model and Settings From Radio: Read the EEPROM contents (model and transmitter settings) from the transmitter, and open them in a new .otx document in OpenTX companion. The document is opened for editing, but is not saved to disk automatically.
- Write Model and Settings To Radio: Write currently open and selected .otx document window to the transmitter. If more than one is open, make sure to click on the one you want to transfer first before selecting write model and settings to transmitter. To avoid mistakes close all other .otx document windows. It is suggested that a “Backup Radio to File” is done before writing model and settings to the transmitter.
- Backup Radio to File: Read the EEPROM contents (model and transmitter settings) from the transmitter directly into a file. This is the preferred way to backup the transmitter and model settings as it will be saved “as is” without OpenTX companion processing it. Choose a save location and filename. This will be a .bin file. This recommended prior to writing firmware to the transmitter.
- Write Backup to Radio: Write EEPROM memory (model and transmitter settings) from a file to the transmitter. Chose a .bin file previously saved using Companion. This is the preferred way to restore a backup of the transmitter and model settings as Companion does not process it.
- Write Firmware to Radio: Write transmitter’s firmware from the selected file to the transmitter. The OpenTX Firmware section below has more details on downloading the firmware and writing it.
- Read Firmware from Radio: Back up the firmware that is currently on the transmitter to a file. This recommended prior to writing firmware to the transmitter.
The OpenTX Firmware
Back Up Before Updating Firmware
Before updating the firmware use the Companion Read/Write menu to:
- Backup Radio to File – Saves a copy of the models and transmitter settings to the computer.
- Read Firmware from Radio – Saves a copy of the transmitter firmware currently in use to the computer.
Downloading The OpenTX Firmware
The only recommended way to download the OpenTX firmware is using Companion. This process compiles/builds the firmware on the OpenTX servers and downloads a copy to the computer.
To download the firmware follow these steps:
- Radio Profile: Make sure the correct transmitter profile is selected
- Build Options: Make sure the build options selected are the ones you want

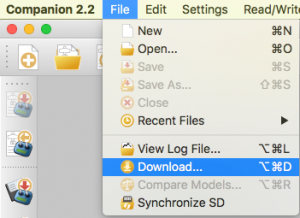
- Download Firmware: File -> Download
- Click on Download firmware (The download could take a few minutes)
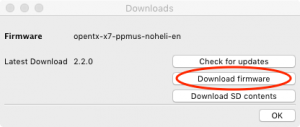
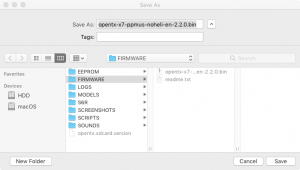
- Save the firmware .bin file on the computer
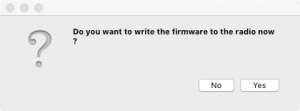
- You may be prompted to write the firmware to the transmitter
(Depends on if “Offer to write FW to TX after download” is selected in the Transmitter profile.)
- If you want to choose yes connect the transmitter to the computer in bootloader mode
- Click on Yes

- Select Check Hardware compatibility to make sure the firmware being written to the transmitter is for that particular hardware.
- Click on Write to TX

- Eject the mounted drives
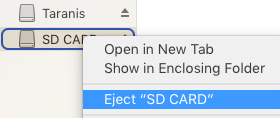
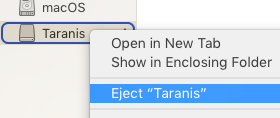
- Disconnect the USB cable
- Power the transmitter off
- Click on Yes


Writing The OpenTX Firmware
Connect the transmitter to the computer in boot loader mode as explained above.
- Wait for the Taranis and SD Card drive to appear
- The transmitter LCD displays “USB Connected”
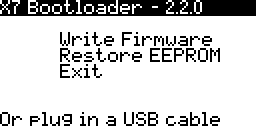
There are two options to write the firmware:
- Using The Bootloader Menu
- Using Companion
Using The Bootloader Menu
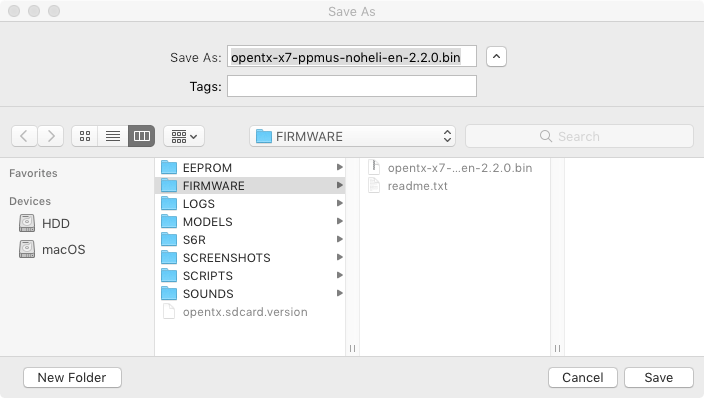
- Place a copy of the firmware on the sd card in the FIRMWARE folder

- Rename the firmware file so that the filename including the .bin extension is 35 characters or less.

- Eject the two mounted drives
- Disconnect the USB cable

- Choose Write Firmware from the bootloader menu
- Select the firmware to be written
- Press ENT
- Hold ENT down to start writing the firmware
- When the “Writing Complete” message is displayed press EXIT
- Power the transmitter off
Using Companion
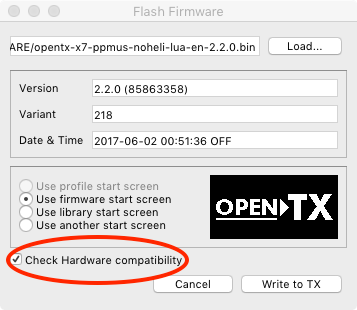
- Read/Write -> Write Firmware to Radio
- A Flash Firmware window appears
- Click on Load and select the firmware file downloaded using companion
- You may change the start up splash screen. More…
- Select Check Hardware compatibility to make sure the firmware being written to the transmitter is the correct one
- Click on Write to TX
- Eject the two mounted drives
- Disconnect the USB cable
- Power off the transmitter
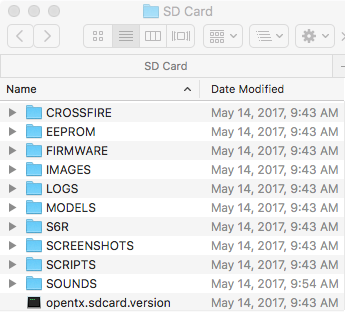
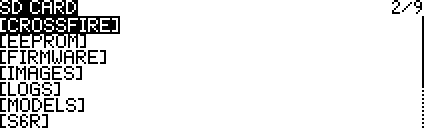
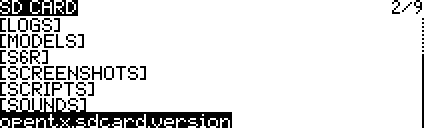
SD Card Contents
Downloading The SD Card Contents
The sd card contents can be downloaded using companion. Most of the download consists of audio files in the SOUNDS folder. To learn more read the Sounds & Announcements documentation and SD CARD screen documentation. The contents vary according to the transmitter based on their capabilities and existence of files compatible with their capabilities.
- File > Download
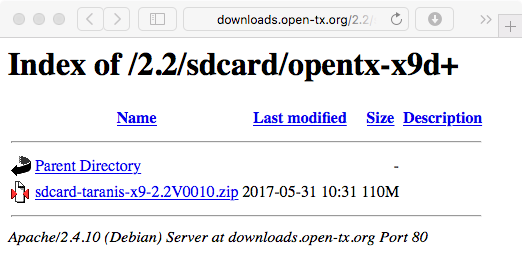
- Click on Download SD contents
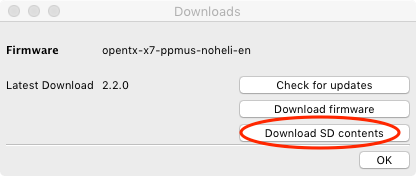
- The zip file available for download depends on the Companion transmitter profile being used.
- Click on the zip file link to download the microSD card contents

- Click on the zip file link to download the microSD card contents
Writing The SD Card Contents
Transfer the files to the SD card in one of the following ways:
- SD Card Reader – This is the fastest method
- Connect In Bootloader Mode – This method is considerably slower when transferring all the audio files
Extract the ZIP file to the root/top level folder of the microSD Card.
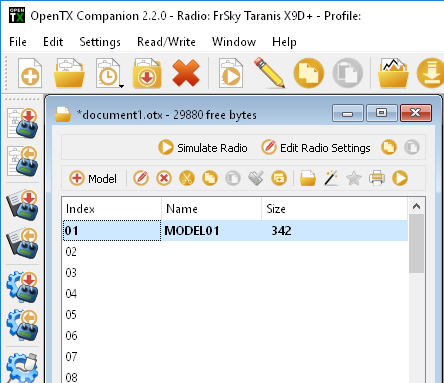
.OTX Document Window
The .otx document window is accessed in one of the following ways:
- Read/Write -> Read Models and Settings From Radio
Before doing this connect the transmitter in bootloader mode
- File -> New
Note: Do not write to the transmitter using a model selection window created in this way. The transmitter settings and calibration will be written over.
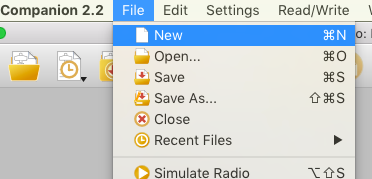
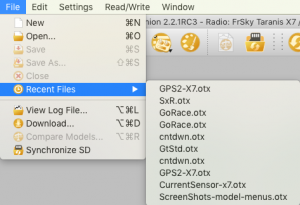
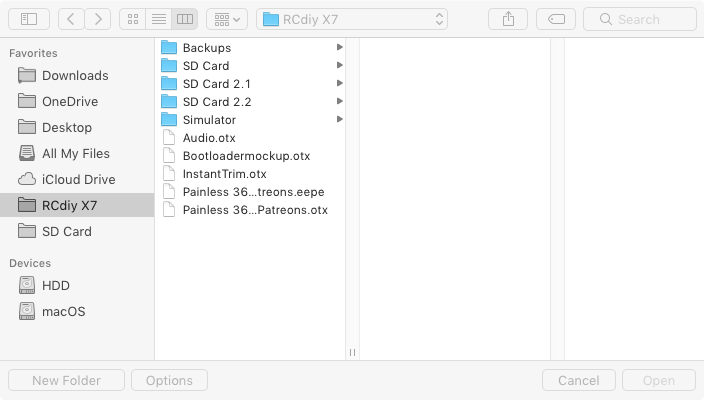
- File -> Open and then selecting a previously saved .otx file.
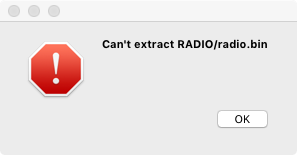
Companion can not open firmware files. Trying to open a firmware file using Companion will result in an error message being displayed.
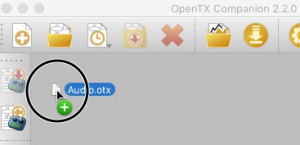
- Drag & Drop a .otx on to the application window.

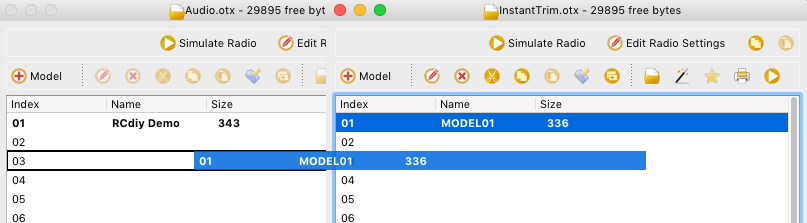
The .otx document window has:
- Toolbars along the top. If missing If missing right click on the grey area and choose Show Model Actions and Radio Actions Toolbar from the context menu.


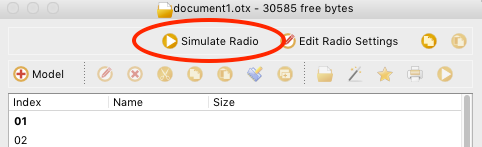
- Simulate Radio: Click on this once to launch the transmitter simulator. More information on this below.
- If missing right click on the grey area and choose
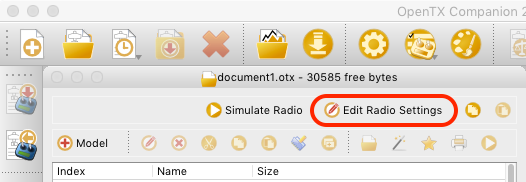
- Edit Radio Settings: Click on this once to access the transmitter settings window. The settings here mirror the settings on the transmitter firmware. More…
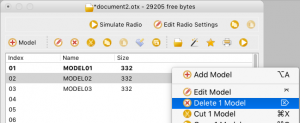
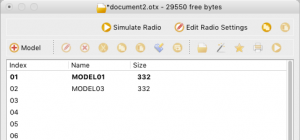
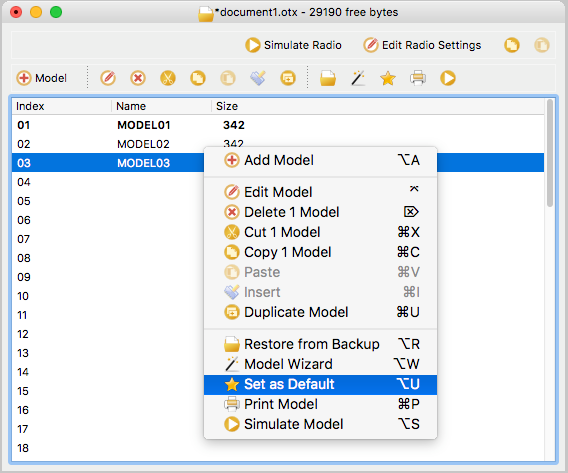
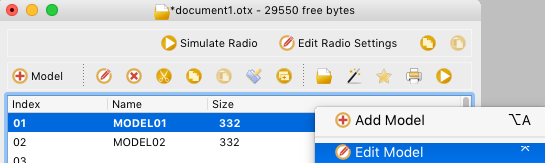
- Model Selection List:
- Index: Up to 60 different models slots
- Name: Model name up to 10 characters
- Size: Memory space used
- Bold /Default Models: The model displayed in bold is the default model. This is the model that is used when the transmitter is turned on.
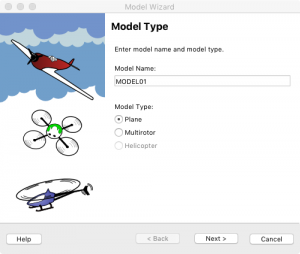
- Double Click On An Empty Model Slot: Launches the model creation wizard.
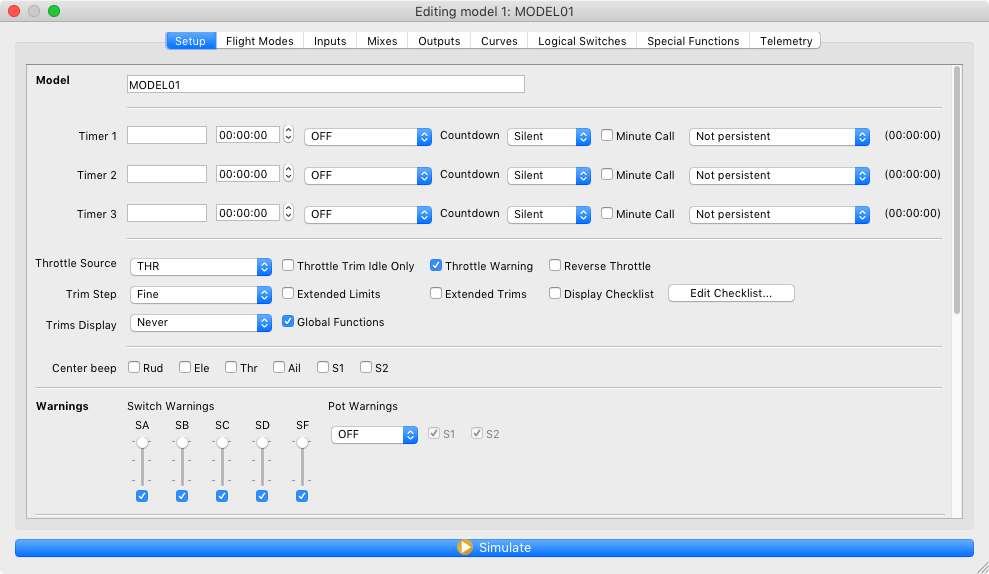
- Double Click On A Model: Launches the model editing window. The settings here mirror the model settings on the transmitter firmware. More…
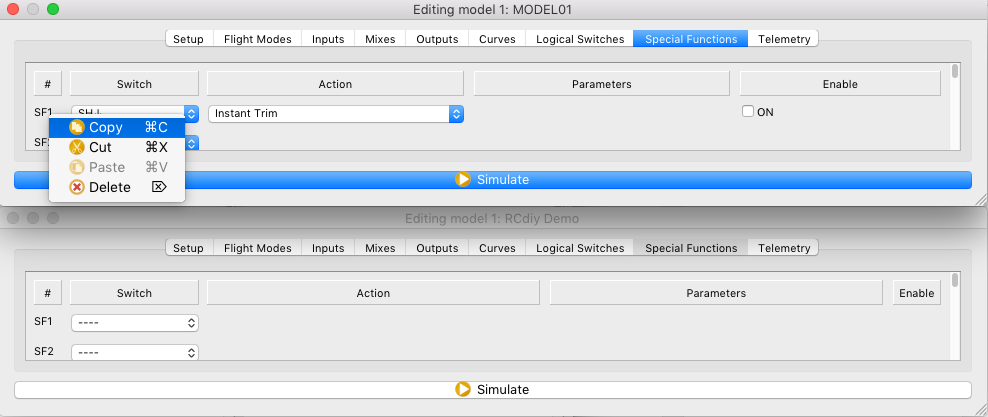
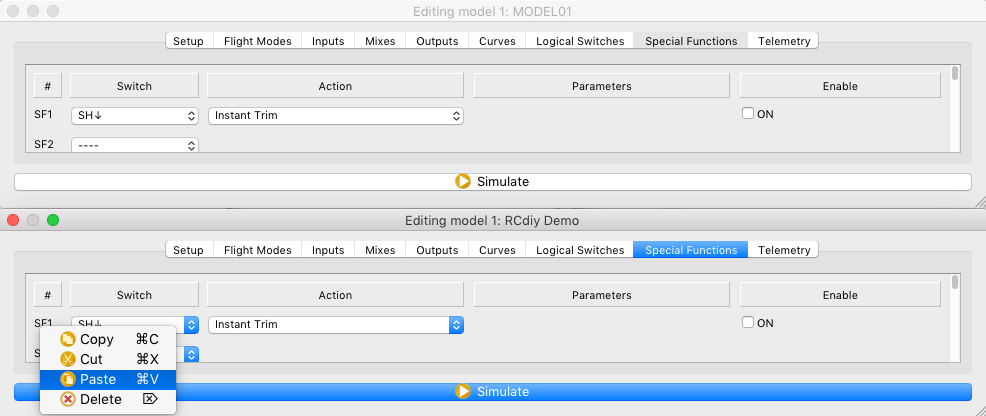
- Right Click On A Model Slot: Displays a context menu with options to edit, delete, cut, copy, paste, insert, duplicate, simulate models, launch a new model wizard, set the selected model as default.
Several .otx document windows can be open at the same time. Models can be coppied between these windows using the context menus or dragging and dropping.

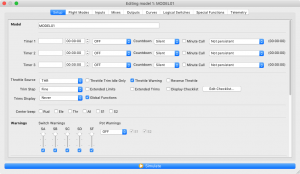
Model Editing
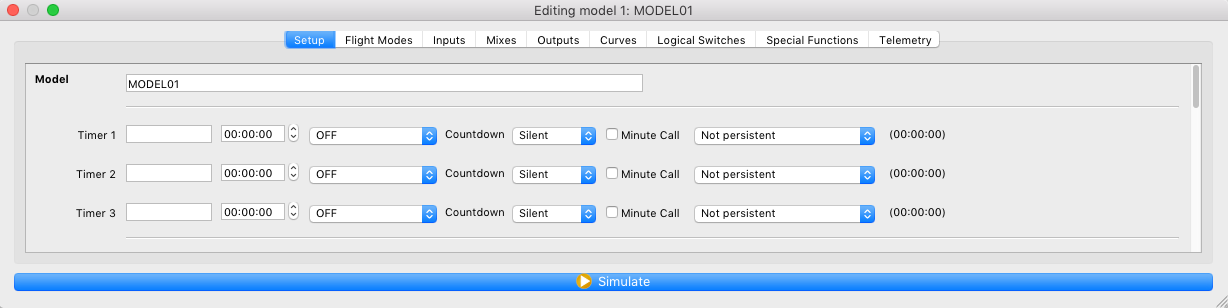
The model editing window has a number of tabs. These tabs in large part mirror the model screens on the transmitter. More…
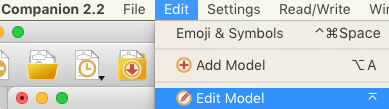
The model editing window is accessed in one of the following ways:
- Double click on a model is the model selection list
- Right click on a model > Edit Model
- Select a model and then Edit > Edit Model
Several model editing windows can be open at the same time. Settings can be coppied between these windows.
Transmitter Settings
The transmitter settings window has a number of tabs. These tabs in large part mirror the transmitter settings screens on the transmitter. More…
To launch the Transmitter settings window:
- Model Selection Window: At the top of the .otx document window is a “Edit Radio Settings” button that will open the transmitter settings window.
Transmitter Simulator

The transmitter simulator provides a way to test transmitter and model behavior before writing configurations and settings to the transmitter.
Changes made in the simulator are temporary and will not be saved when the simulator is closed.
There are two ways to launch the simulator:
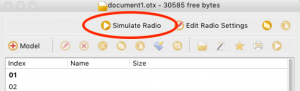
- Model Selection Window: At the top of the .otx document window is a “Simulate Radio” button that will open the transmitter simulator with the current settings.
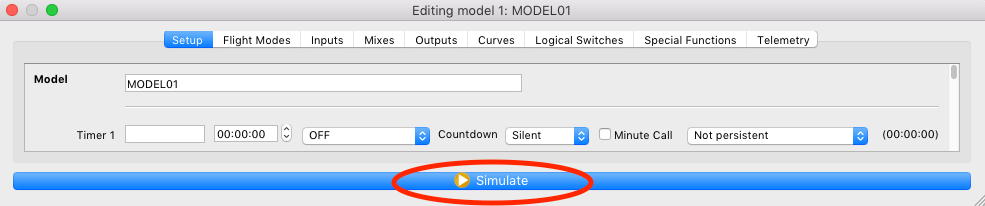
- Model Editing Window: At the bottom of the model editing window is a “Simulate” button that will open the transmitter simulator with the current settings.

Telemetry Simulator
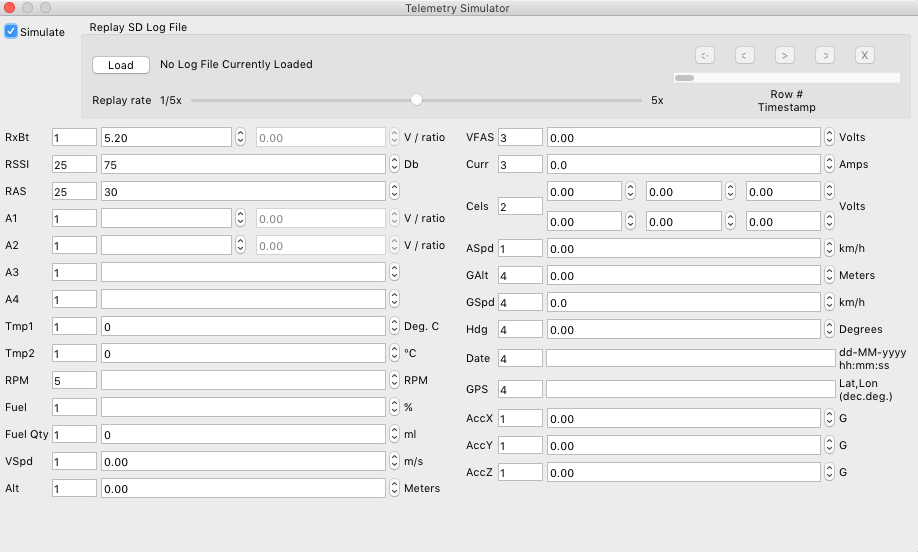
The telemetry simulator provides telemetry data to the transmitter simulator.
- Simulate – Make sure this is selected to start sending data to the transmitter simulator.
- Replay SD Log File – This section is used to load an OpenTX saved log file and play back the values in each row automatically or one at a time.
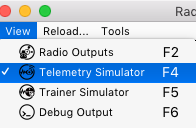
- To launch the telemetry simulator click on View -> Telemetry Simulator
Trainer Simulator

The trainer simulator simulates a second buddy box/transmitters sticks.
- To launch the telemetry simulator click on View -> Trainer Simulator

Keeping This Manual Up To Date
Please help keep this manual up to date. If you find that information is missing, incorrect on unclear please post on this manual’s thread in the Flite Test forum. More…
Credits
- Based on information in the OpenTX Taranis Manual by The Developers
- This documentation was contributed to the Manual for OpenTX 2.2 by The Developers
- Dean Church