Introduction
Contents
Click on image to enlarge.

Taranis Q X7 Series
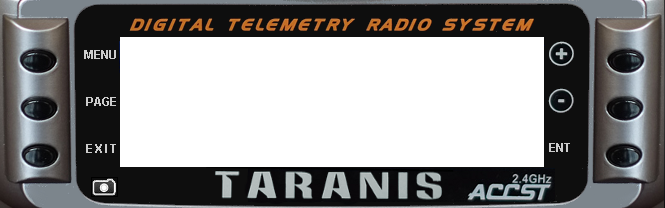
- PAGE
- MENU
- EXIT
- Scroll Knob
- ENTER press scroll knob
Taranis X9D Series
- MENU
- PAGE
- EXIT
- (+) Plus
- (-) Minus
- ENT for ENTER
Button Actions
- Press
Press and release a button in under a second. - Long Press
Press until screen changes, about a second, an then release. - Scroll
Turn the Scroll Knob or press (+) or (-) buttons.
Button Behaviour
- PAGE
Press to change screens.
Long press to change from main view to telemetry view.
Long press to go back a screen when in model or radio menu views. - MENU
Press to change from main view to model menu view.
Long Press to change from main view to radio menu view. - EXIT
Press to go back from one view to previous view such as from telemetry view to the main view.
Press to stop editing text fields such as names. - ENTER
Press to edit/change a value/field.
Press to stop editing when editing some settings such as the timers.
Press to select character and move to the next when editing text fields such as names.
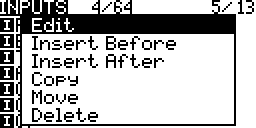
Long press to bring up a context menu.
Here are just a few examples
- Knob
Scrolls up and down.
Turn clockwise to selection (cursor) forward or down.
Turn counterclockwise, left, to move selection backwards or up.
Changes values when editing. - (+) and (-)
Scroll up (+) and down (-).
Changes values when editing.
Pressing both (+) and (-) together will invert a value.
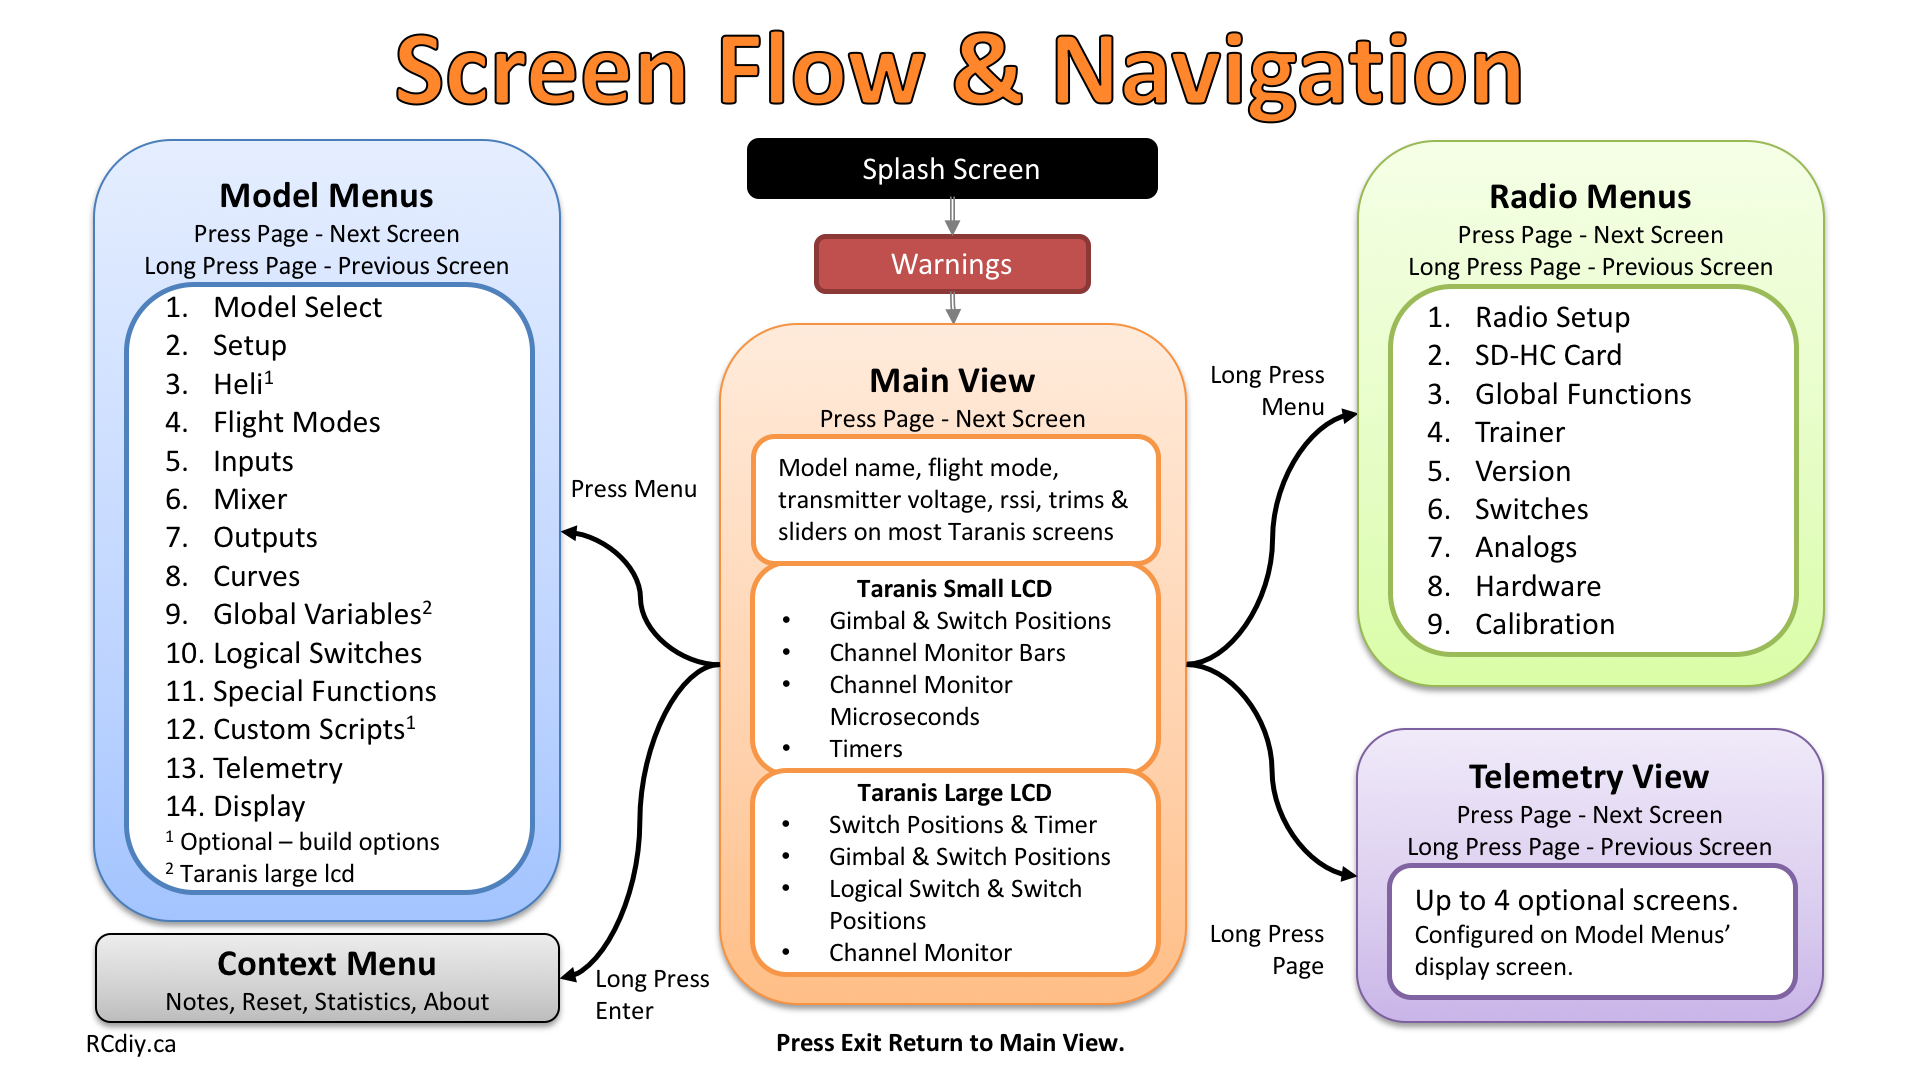
When the transmitter is turned on the screen displays information.
Splash Screen
When the transmitter is powered on the screen displays an image for a few seconds. The appearance and duration is configured on the radio set up screen. The image can be changed using Companion when the firmware is flashed on to the transmitter.

Warnings
When the transmitter is turned on and when a model is selected and loaded the firmware does a number of checks. These checks may result in a number of different warning screens being displayed after the splash screen. The warning screens are cleared by either fixing the condition that resulted in the warning or pressing EXIT.
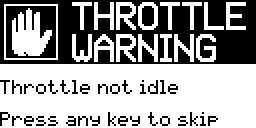
- Throttle Warning
The throttle stick is not at idle (all the way down).
To clear this screen move throttle the stick all the way down.
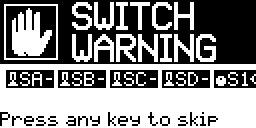
- Switch Warning
The shown switches, knobs and sliders are not in the correct position as configured on the model setup screen.
To clear this screen move the switches shown to the correct positions as shown.
↑ (up) – (middle) ↓(down) →(centre)
- Failsafe Warning
The failsafe settings are on the model setup screen.
To clear this screen press EXIT but configure the failsafe on the model setup screen to prevent this warning from appearing again.

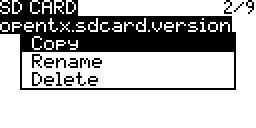
- SD Card Warning
Shown when an SD Card is present but missing or has the incorrect version file. More…
To clear this screen press EXIT but place the correct version file on the SD Card along with ensuring the SD Card has the correct content to prevent this warning from appearing again.

Main View
The main view is the default view after the splash and warnings screens. This view shows information such as the model name, trim positions, transmitter battery voltage, flight mode and timer one. There are four main view screens. More…
- Press PAGE to change and cycle through screens.
- The following screens are examples from a Taranis Q X7 series & X9 series of transmitters.

Taranis Q X7 Series

Taranis X9 Series
Telemetry View
Telemetry screens are optional and are displayed if configured on the display screen under the model screens section. They display model information as number or bars, or display a Lua script’s screen. There may be up to four telemetry view screens. More…
- Long Press PAGE when the main view is displayed to access the telemetry view.
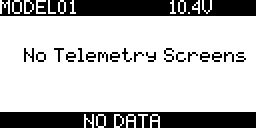
- Press PAGE to change and cycle through the screens.
- Press EXIT to go back to the main view.
Model Menus
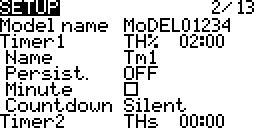
Model menu screens show information and allow editing of settings related to the current model selected and loaded. There are 11 or more model menu screens depending on build options chosen and transmitter being used. For example two of the screens (heli setup and custom scripts) are optional. More…
- Press Menu when the main view is displayed to access the model configuration view.
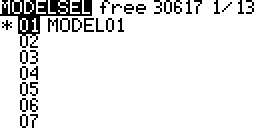
- Press PAGE to change and cycle through the screens.
- Long Press PAGE to to change and cycle through the screens in reverse.
- Turn the Knob or use (+) (-) to scroll up and down.
- Press EXIT to go back to the main view.
Radio Menus
Radio menu screens show information and allow editing of settings related to the transmitter and are independent of the current model selected and loaded. There are 9 radio setup, action and information screens. More…
- Long Press Menu when the main view is displayed to access the model configuration view.
- Press PAGE to change and cycle through the screens.
- Long Press PAGE to to change and cycle through the screens in reverse.
- Turn the Knob or use (+) (-) to scroll up and down.
- Press EXIT to go back to the main view.
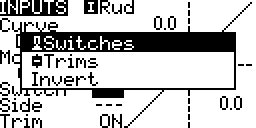
Editing
Most of the radio and model screens have settings that can be changed.
For example:
- From the Main View
- Press MENU
- To scroll up and down use the knob or (+) (-) buttons.
- Press PAGE to co to the next screen.

- To edit a filed scroll to it using the Scroll Knob or (+)(-) buttons.
- Press ENTER
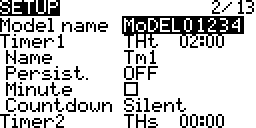
- Text Field (name)
If it is a text field such as a name the cursor changes from highlighting the whole field to just one character

Scroll to change values, use the knob or (+) (-) buttons.
To move to the next character Press ENTER
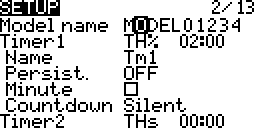
To change case (upper/lower) Long Press ENTER
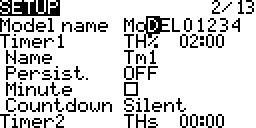
Scroll to change the characters.
To stop editing press EXIT or repeatedly press ENTER till the cursor moves past the last character; The whole field is now selected when editing stops.
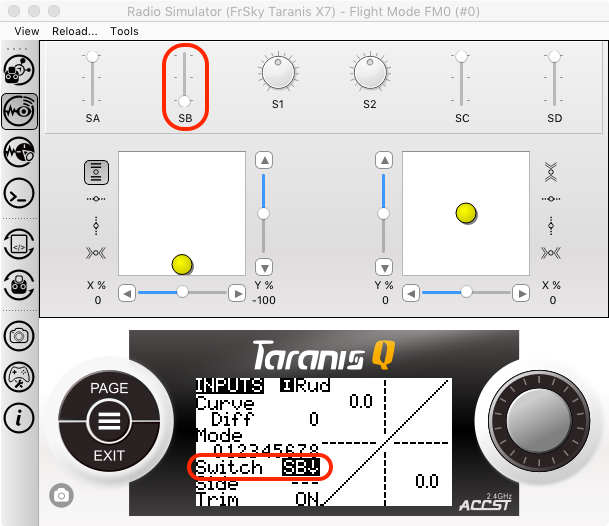
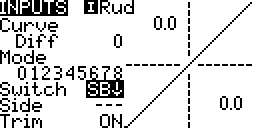
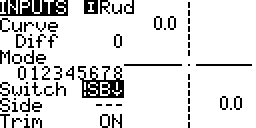
- Setting Field (non-name)
The cursor will start to blink on the whole field.
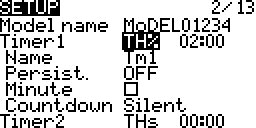
Scroll to change the values

To stop editing press EXIT; The cursor stops blinking.
- Text Field (name)
While editing a switch setting moving the switch on the transmitter will auto populate that switch to the setting being edited.
In this example switch B (SB) has been moved to the down position (SB↓).