
OpenTX
Contents
Setup
- Connect the Tx, load its models and settings in Companion
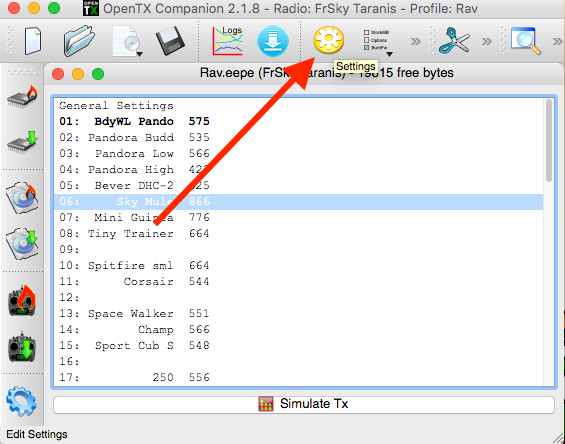
- Click on the Companion Edit Settings icon

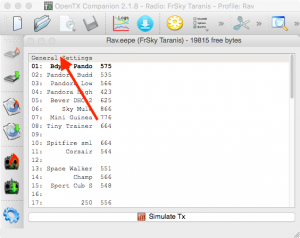
- Double click “General Settings”
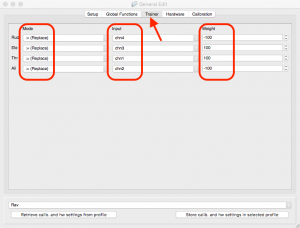
- Select the “Trainer” tab
Under “Mode” select “:= (Replace)”
Under “Input” select the channel corresponding to the student’s transmitter output
Under “Weight” assign “100” or “-100” to invert the student’s input
Increase or decrease “100” according to the servo throw response you want
Close the window using the top left corner close icon
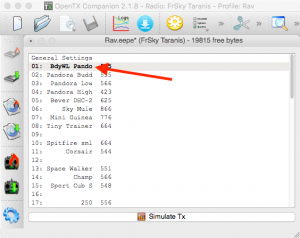
- Double click the model that will be used at the trainer
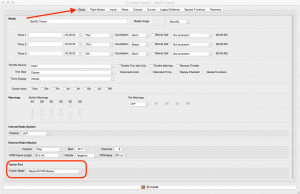
- Select the “Setup” tab
Under “Trainer Port” select the “Master/CPPM Module” Trainer Mode
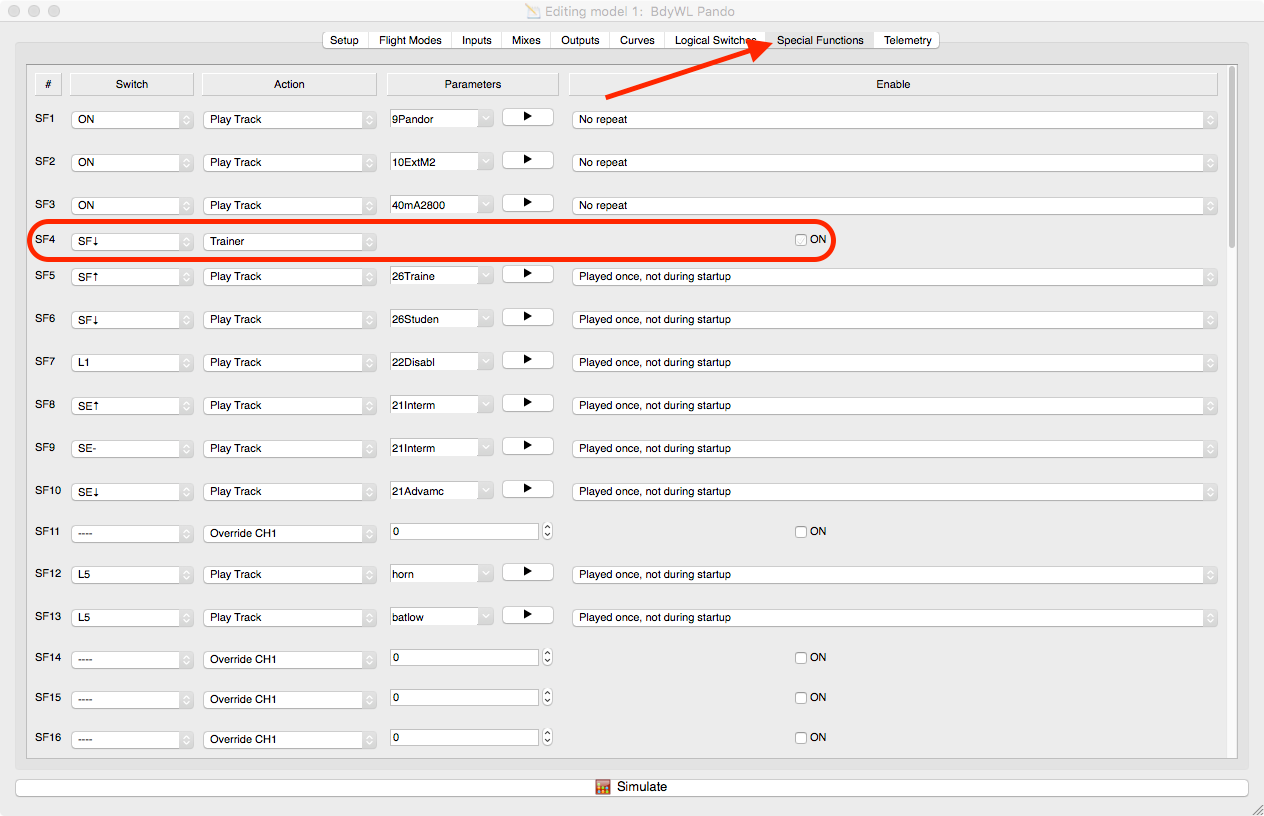
- Select the “Special Functions” tab
Assign a switch to the Trainer function, make sure “ON” is selected

- Write the firmware and then mode and settings to the Tx
Disconnect the Tx and power cycle it


Student Trainer Wireless Link
- There are many options when it comes to establishing the wireless link. The instructions to establish a wireless link are dependant on the wireless link option chosen.
- In general establishing the wireless link steps are
- Turn on the student’s Tx and place it in “Bind” mode
- Turn on trainer’s Tx and place the wireless link module into “Bind” mode
- If all goes well they bind and you can move on to testing and tuning the trainer setup
- This video shows the binding of the DasMikro DSM2 micro receiver installed in a Taranis
Testing & Tuning
- On the Trainer’s Tx
Once the binding is done go to the main screen
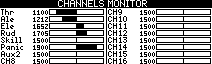
- Press “PAGE” repeatedly till you get the “CHANNELS MONITOR” screen
Move all 4 of the Tx sticks and observe direction and magnitude of the output
Go into trainer mode and do the same with the students Tx while watch the trainer’s Tx screen
Compare the direction and magnitude of the output from the student’s Tx to the Trainer’s
make note of any discrepancies
- Go back to the main screen
- Long press “PAGE” then
Press “PAGE” repeatedly till you get the “TRAINER ” screen
Place all the Student’s Tx sticks in their centre positions
On the calibration line you should see four zeros “Cal 0 0 0 0”
If you don’t you may if you wish do a calibration which will set the current received signals and the centre positions for the Student’s Tx sticks
To calibrate press (-) repeatedly till “Cal” is selected, press “ENT”
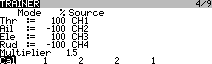
- Throw direction of the Student’s Tx sticks can be corrected done here or on the Student’s Tx
Press (-) or (+) repeatedly until “100” corresponding to the stick whose direction needs to be changed is selected
Press “ENT” and then press (-) and (+) together, this adds or removes the “-” (-ve sign)
Press “ENT” to set the value, - Throw amount of the Student’s Tx sticks can be changed here is two ways
Assuming you want the Student’s Tx sticks throw to match the Trainers
Push the Student’s Tx sticks to one of the top corners
The “Cal” line will read something like “Cal 77 77 77 77”- Change all throws using the “Multiplier”
Press (-) or (+) repeatedly until you select the number next to “Multiplier”
Press (ENT” and then press “+” until the “Cal” line reads “Cal 100 100 100 100”
You may not get an exact 100 which is okay
Press “ENT” to set the value, - Change individual throws
Press (-) or (+) repeatedly until “100” corresponding to the stick whore throw needs to be changed is selected
Press “ENT” and then press (-) and (+) till the desired throw is reached on the “Cal” line
Press “ENT” to set the value, repeat as required for the other sticks
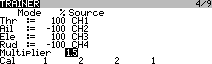
- Change all throws using the “Multiplier”