
Taranis Q X7 With Preinstalled OpenTX
Contents
This post and video covers what to do with the transmitter from the time it arrives till the first model is bound and ready to fly.
The transmitter (Tx) comes with both sticks spring loaded to centre the sticks. For mode 2 the gimbal on the left needs it’s vertical axis (throttle) spring disabled and friction added.
The preloaded software, OpenTX, comes with mode 2 as the default setting and one model configured with four channel outputs.
- CH1 Throttle
- CH2 Ailerons
- CH3 Elevator
- CH4 Rudder
This basic configuration is enough to get flying once a receiver is bound to the transmitter.
If the Rx is connected to the ESC throttle please remove the propeller.
Gimbal Conversion To Mode 2
Video 0:28
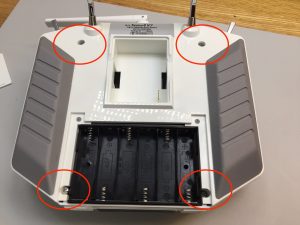
Opening The Case
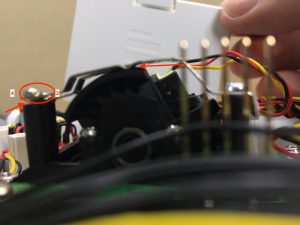
- Remove the four screws shown
Do not separate the case
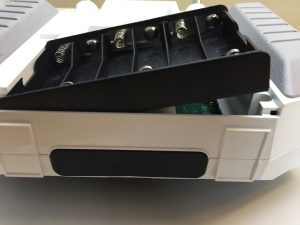
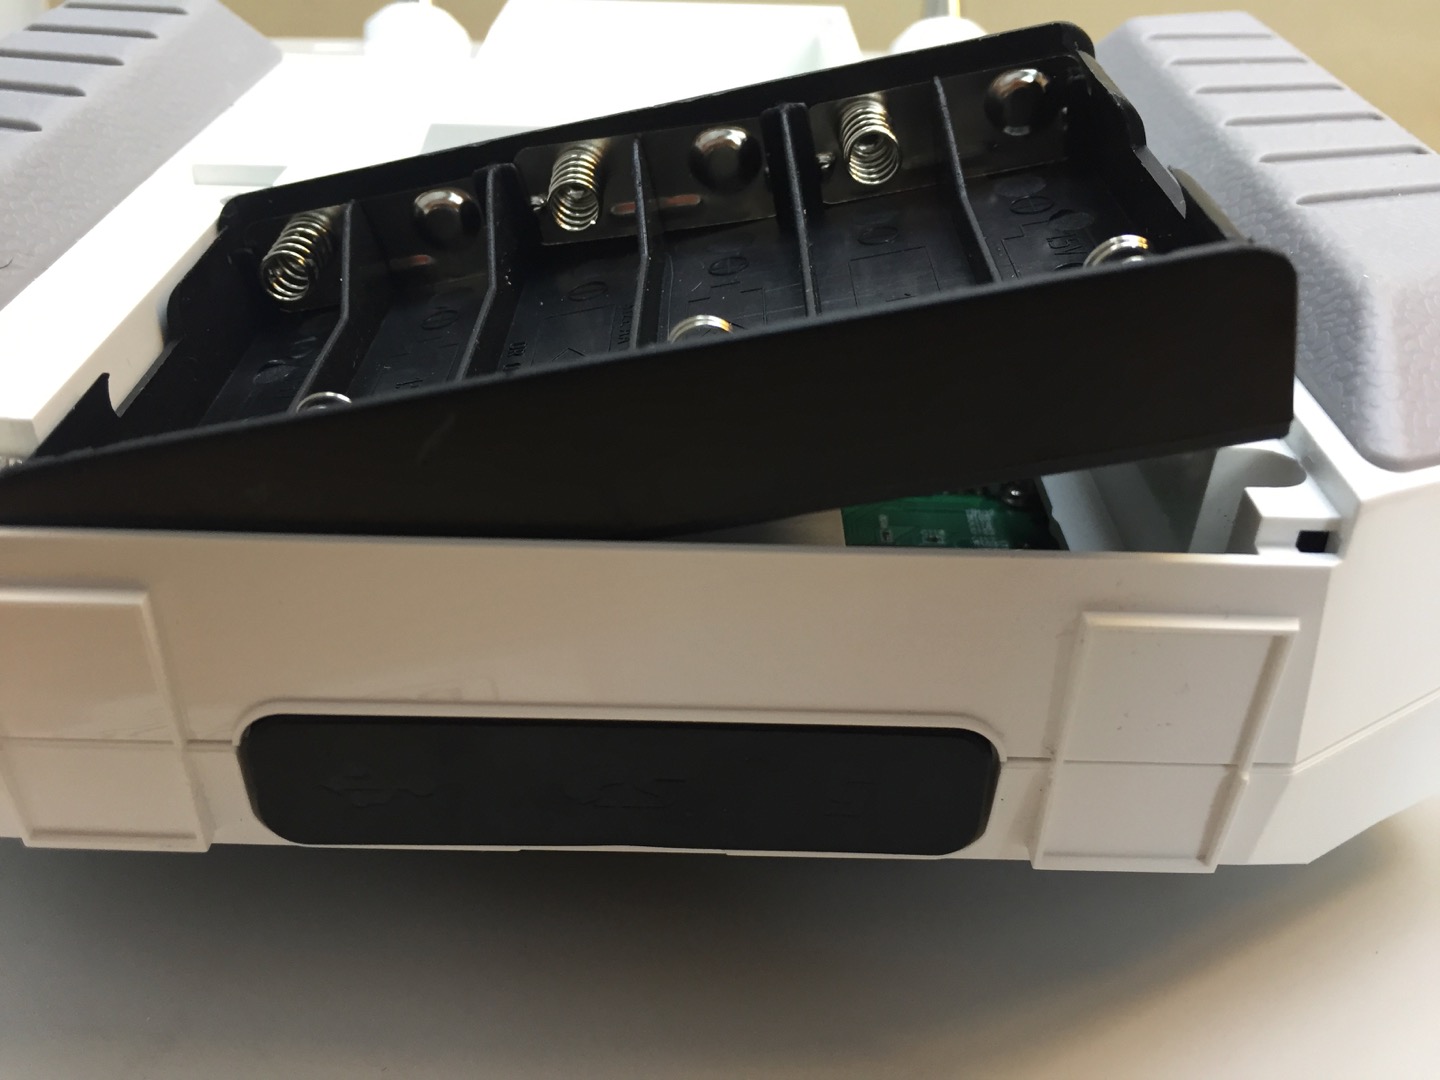
- Remove the battery clip slowly
There is a wire connected to it and a circuit board under it
Lift the right hand side first
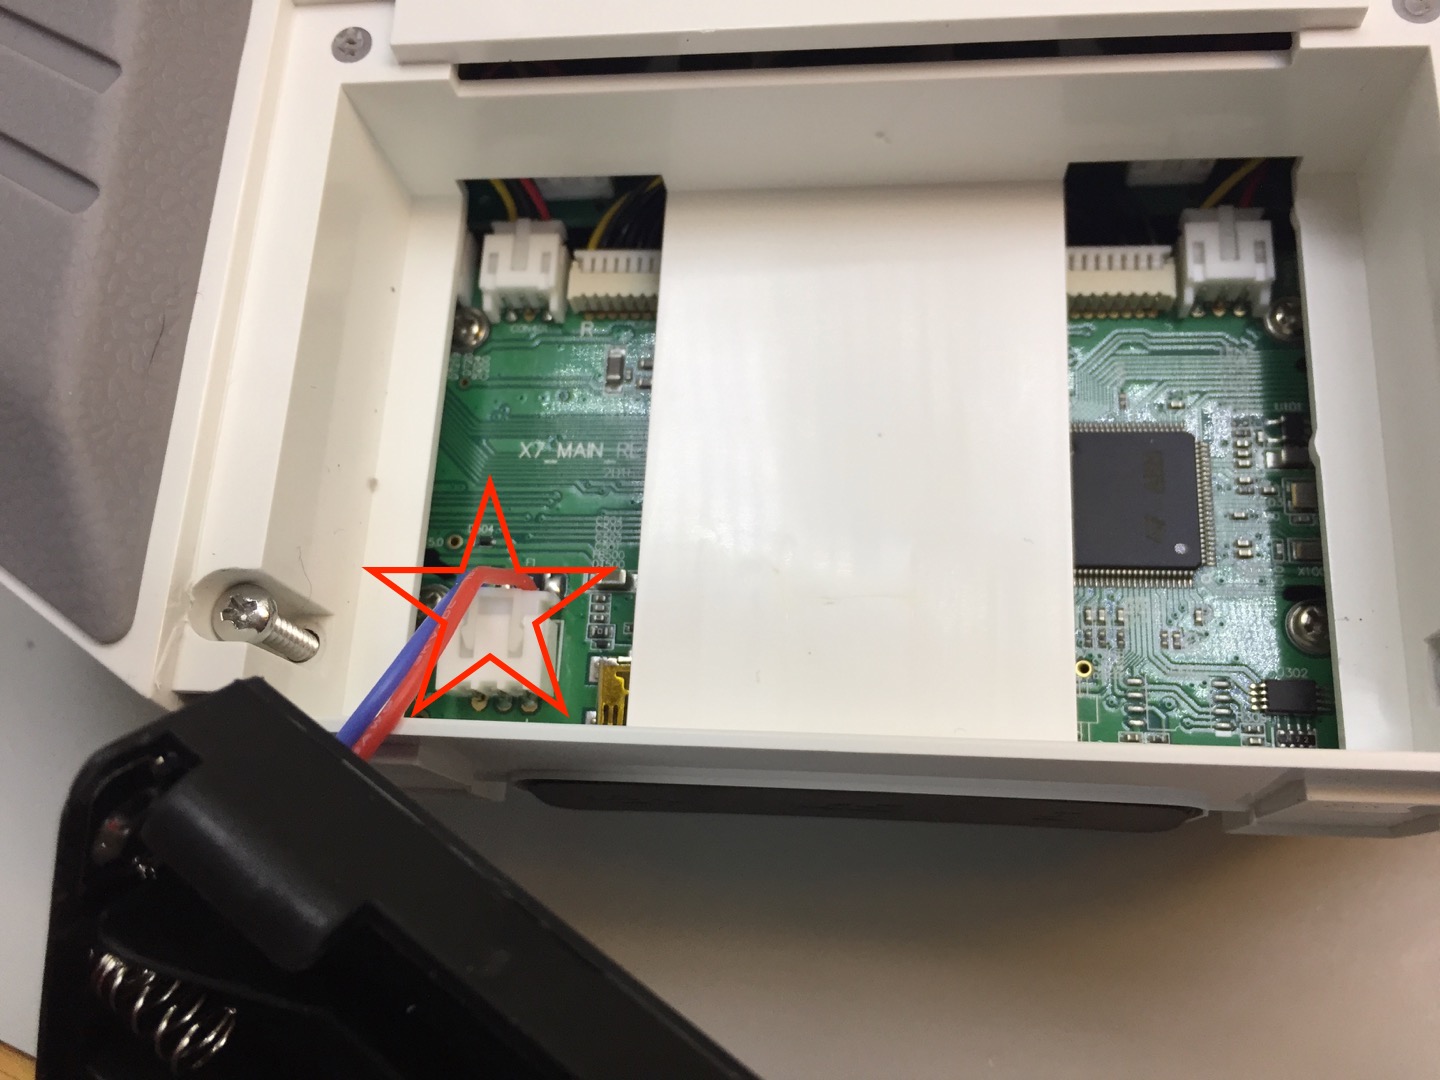
Unplug the wire from the circuit board

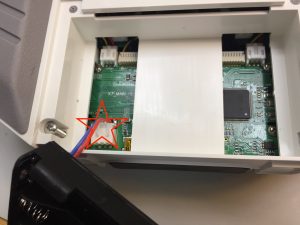
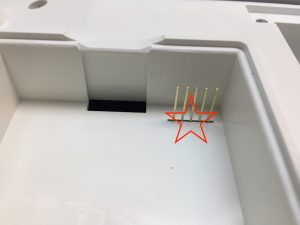
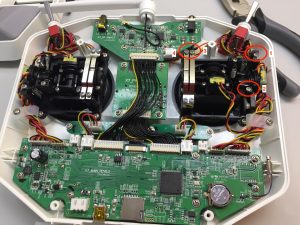
- Carefully separate the two halves of the case in a vertical motion till the pins in the module bay are clear
Be careful not to damage the pins in the module bay


Gimbal Adjustment
Video 1:08
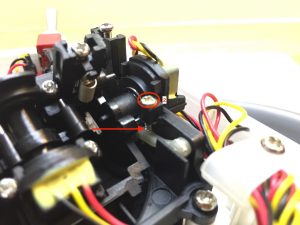
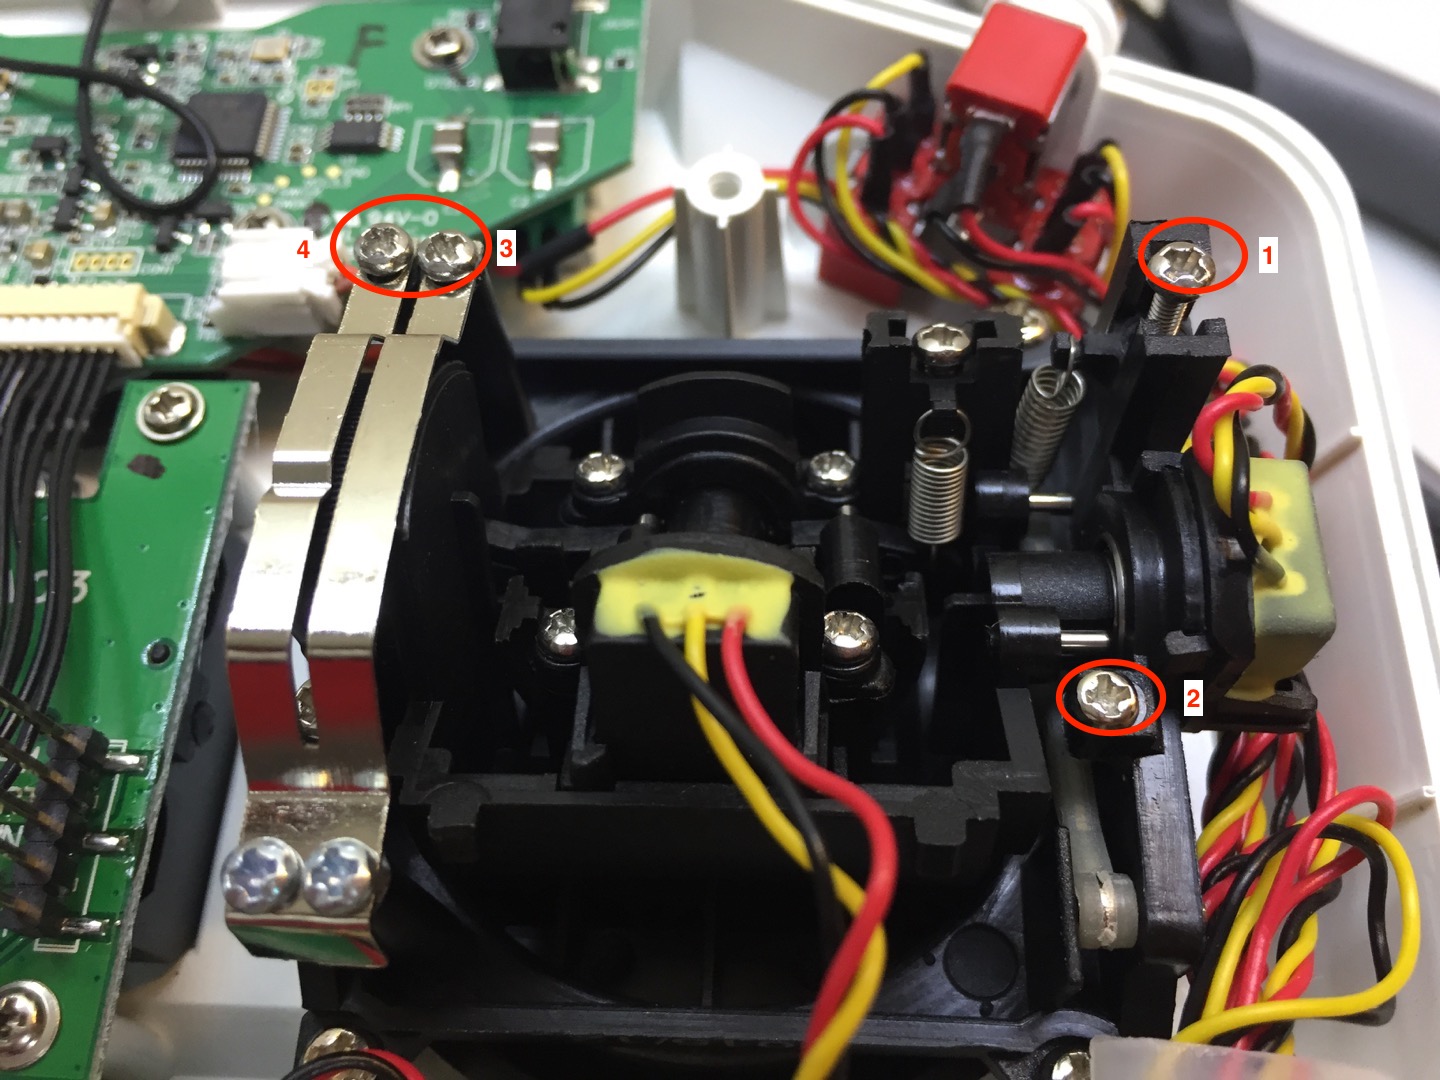
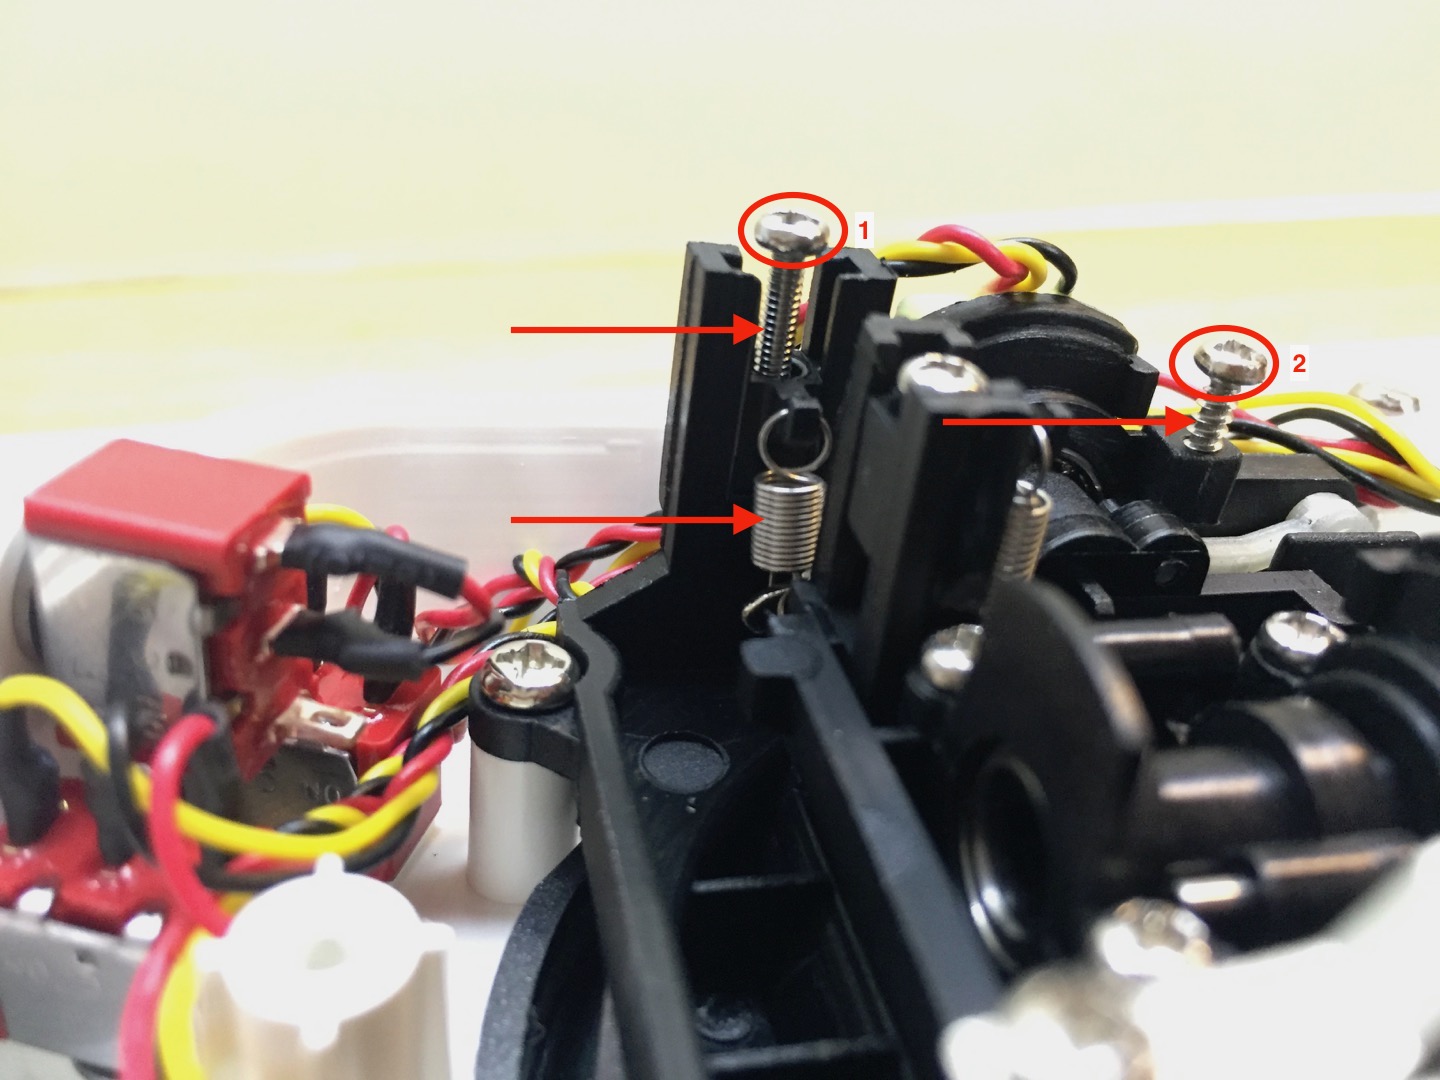
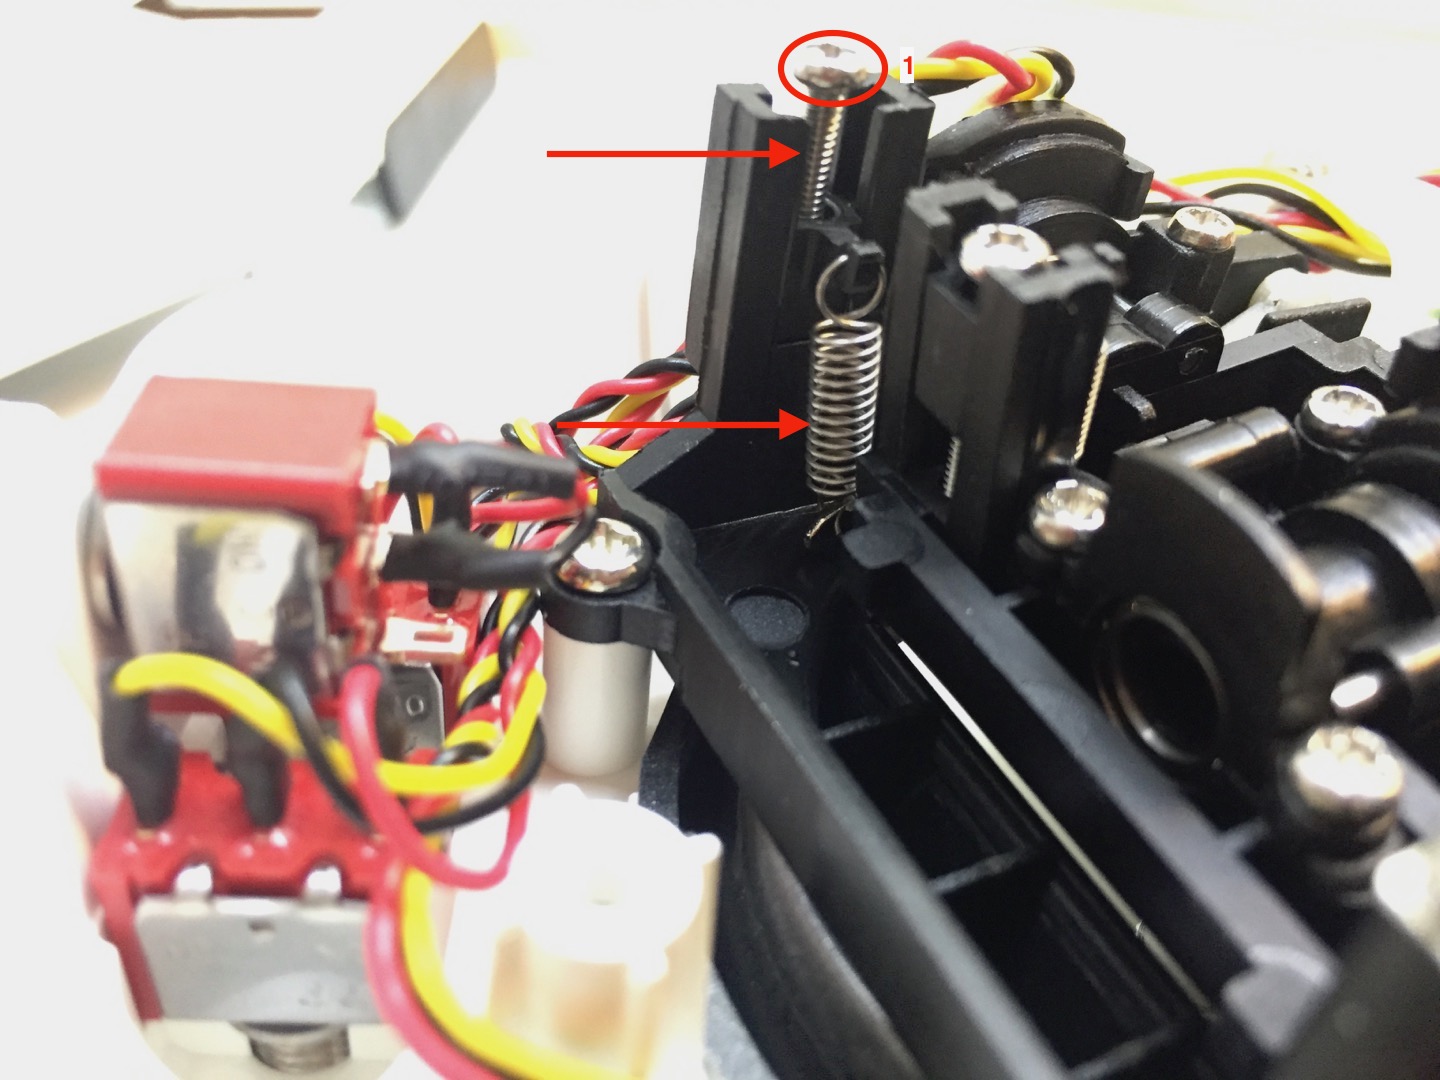
- Locate the 4 gimbal screws shown

- Note where the screw threads are visible and the spring tension
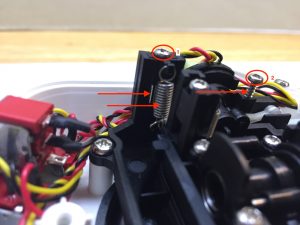
- Turn screw 1 counterclockwise, left, till the spring tension is completely removed

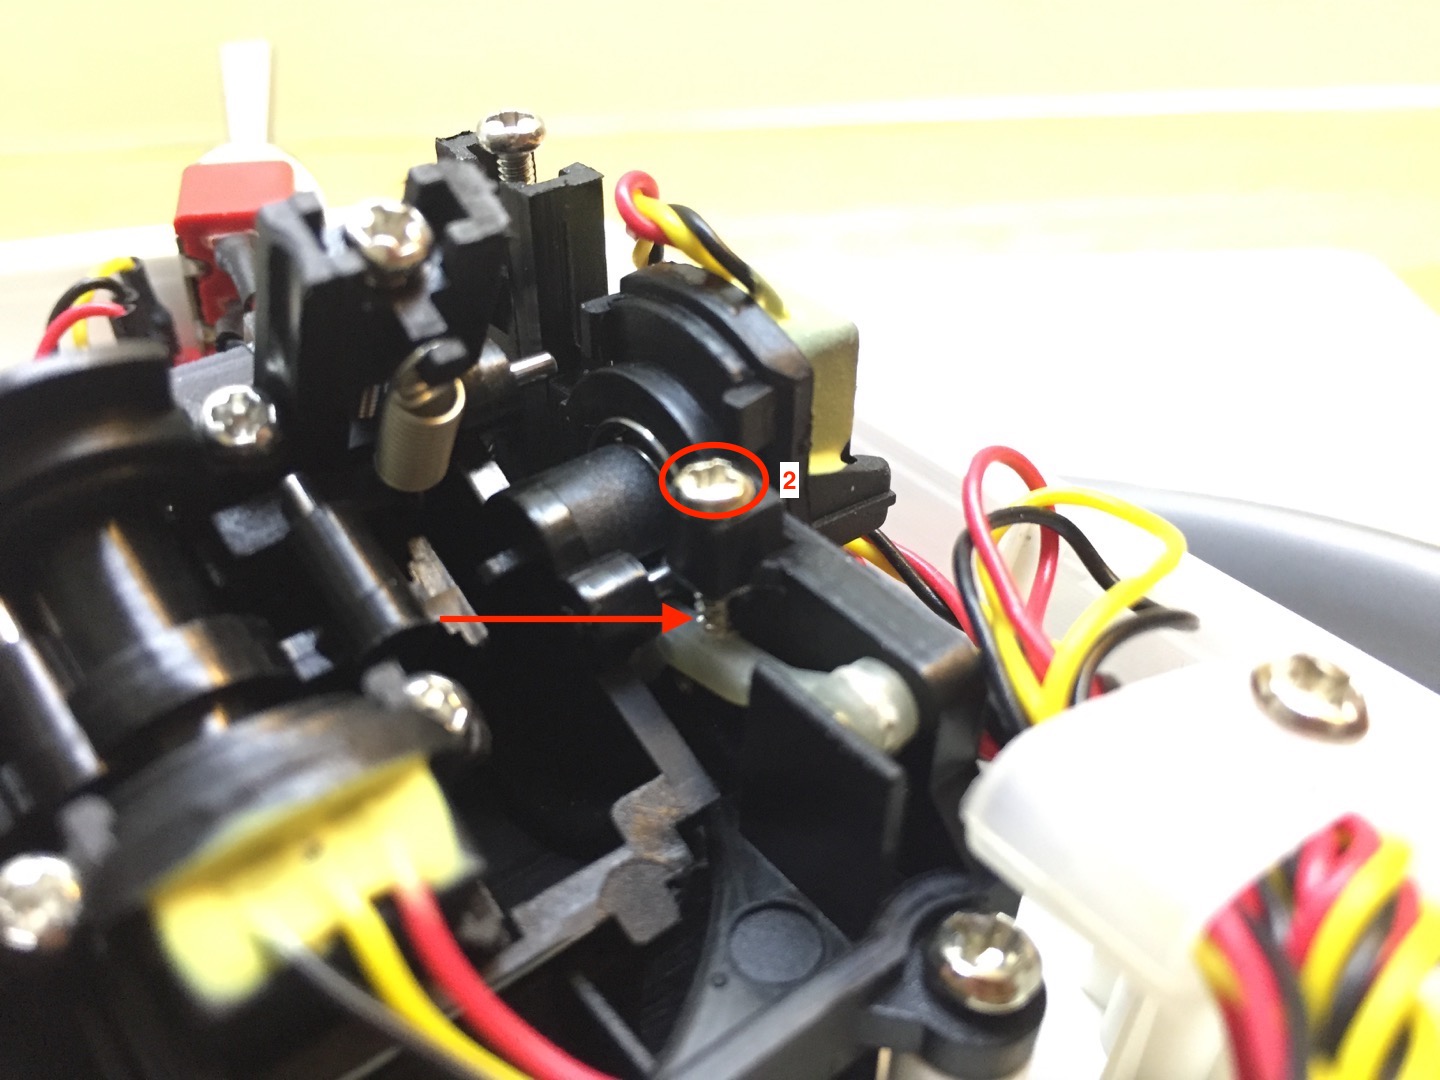
- Turn screw 2 clockwise, right, till it is all the way down
- Note there is now tension on the spring again, this is normal
- You may find that the throttle stick will move on its own
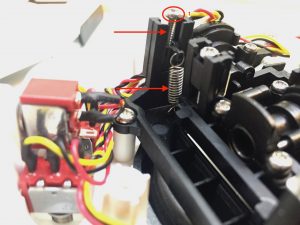
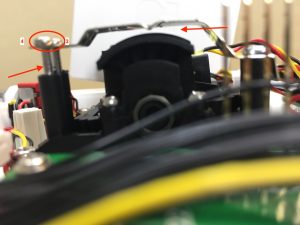
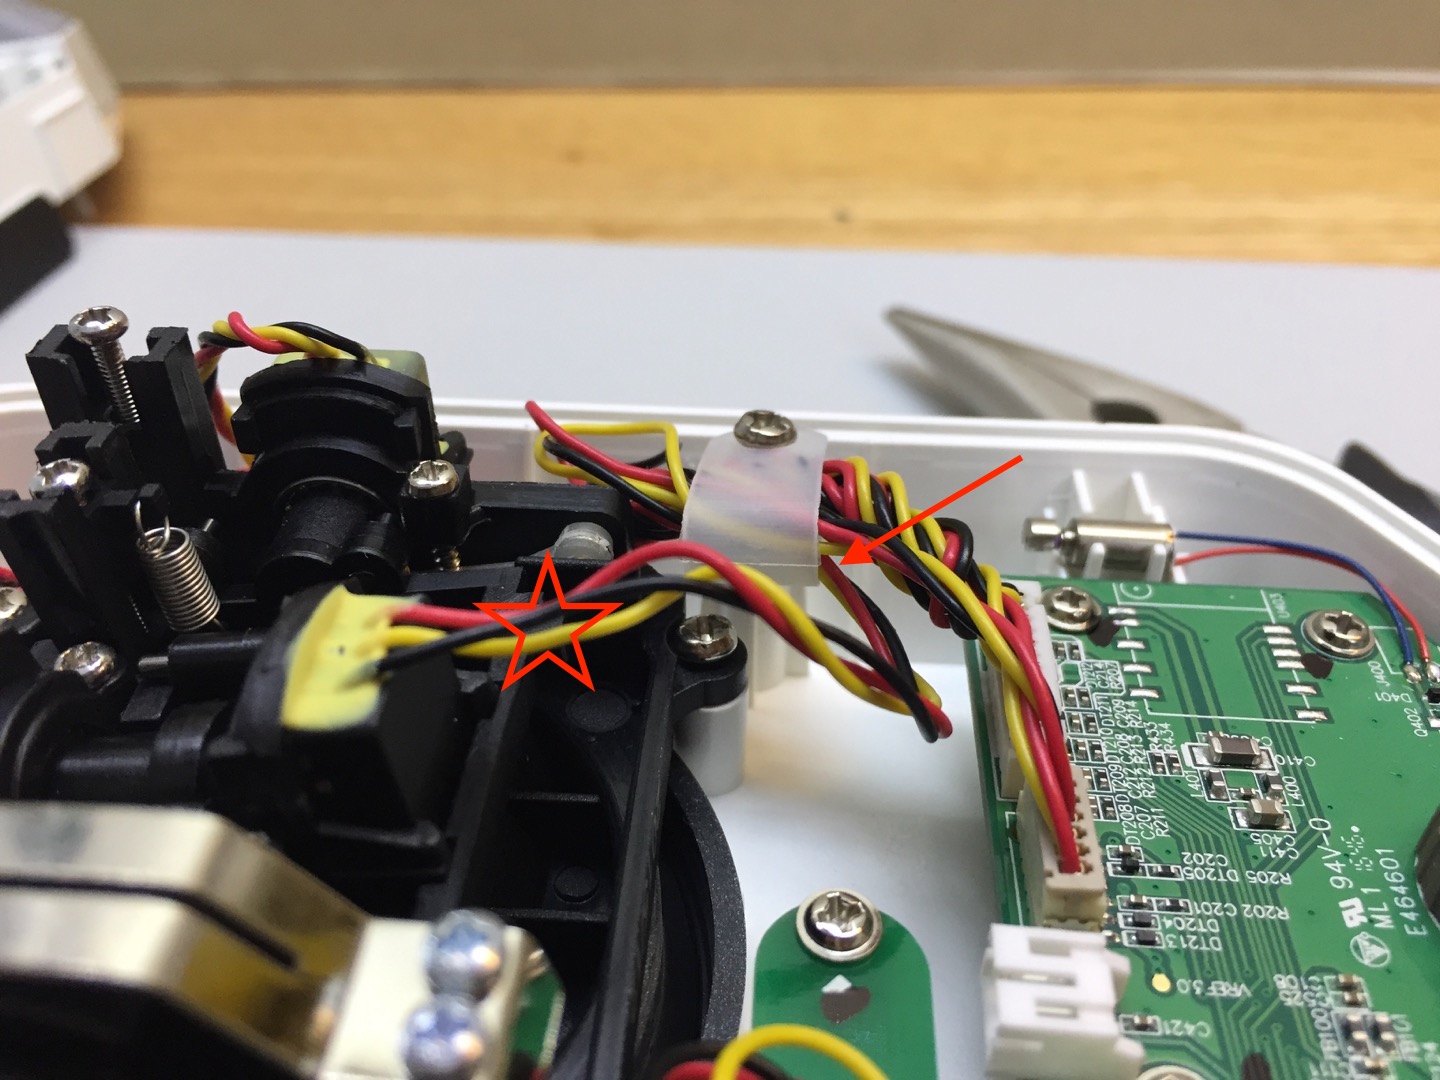
Check the amount of slack on the gimbal wires shown and adjust if necessary

- Note the gap as shown
- Turn screws 3 and 4 clockwise, to the right
Screw 3 affects the smooth friction on the vertical axis
Screw 4 affects the ratcheting (stepped) friction on the vertical axis
Tighten according to your personal preference
I tightened 3 all the way and tightened 4 till I liked the feel when moving the stick


Closing The Case
- Put the case back together carefully
Take care not to damage the module bay pins
- When tightening the screws just make them firm
The screws are being held in plastic which could could get damaged
Using OpenTX & The Transmitter
Video 2:10
Turning On The Transmitter
- Power on the Tx by pressing and releasing the power button

- Clear any warnings by following the instructions on the screen


Turning Off The Transmitter
- Remove power from any receivers that are bound to it
- Power of the transmitter by pressing the power button till the screen goes blank, about 3 seconds
Basic Screens & Views
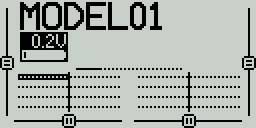
- Main View
Shows the model name
Has multiple pages
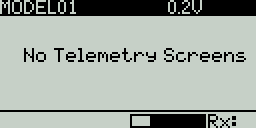
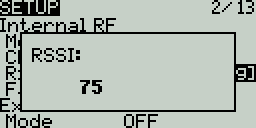
- Telemetry View
Shows telemetry values if configured
May have more than one screen
- Model Configuration Screens
For changing models and configuring them
Has multiple pages
- Radio/Tx Configuration Screens
For performing actions related to the Tx
Has multiple screens

- Press
Press and release in under a second - Long Press
Press until screen changes, about a second, an then release - PAGE
Press to change screens
Long press to change from main view to telemetry screen
Long press to go back a screen - MENU
Press to change from main view to model configuration screens
Long Press to change from main view to Tx configuration screens - EXIT
Press to go back from one view to previous view
Press to exit editing (described below) - ENTER
Press to edit/change a value/field
Press to stop editing
Many more possibilities which will be covered in a separate post - Knob
Turn clockwise to move selection (cursor) forward or down
Turn counterclockwise, left, to move selection backwards or up
Changes values when editing - Documentation may refer to (+) and (-)
This refers to turning the knob
Transmitter Mode 2 Configuration
Video 3:06
- Power on the Tx
Clear errors to reach the main view
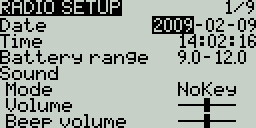
- Long press MENU till the RADIO SETUP screen is visible
- Turn the know clockwise till the number below Mode is selected
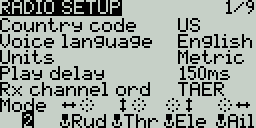
- If the number is not 2 press ENTER
- Turn the knob any direction till 2 appears
- Press ENTER
- Press EXIT twice to reach the Main view
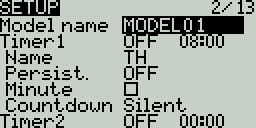
Model Setup
Video 4:34
Determining Transmission Mode
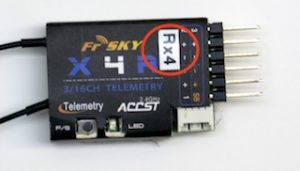
- Identify the receiver (Rx) series and Tx mode
The mode to use is specified in the X7 manual downloaded from here
X series receiver
D16 mode on the Tx


Binding The Rx & Tx Model
Video 5:08
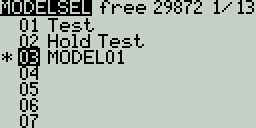
- From the main view
- Press MENU to get to the MODELSEL screen
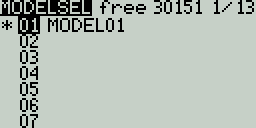
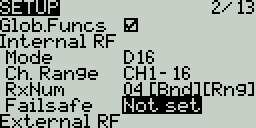
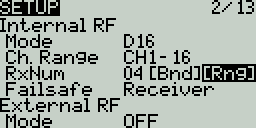
- Press Page to get to the SETUP screen
- Turn the knob clockwise till the mode field is selected
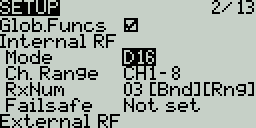
- If required
Press ENTER and turn the knob till the desired mode is selected
Press enter again - Setting receiver number is optional, auto generated
Mark the receiver with the number assigned to track which models and receivers are bound together.
- Select [Bnd]
Press ENTER

- The Tx will start to beep and [Bnd] will start to flash
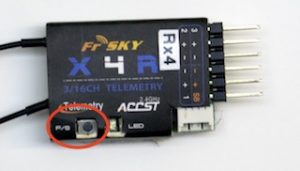
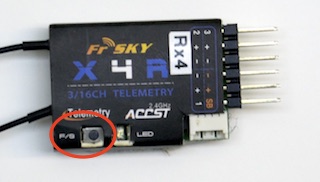
- Press F/S on the Rx and keep it pressed
- Supply power to the receiver
- A green LED means the Rx is now bound
- Release F/S
- Remove power from the Rx
- Press ENTER on the Tx
- The Tx will stop beeping

Setting Failsafe
Video 7:08
- Turn the knob clockwise till Failsafe is selected
- Press ENTER
- Turn the knob clockwise till Receiver is selected
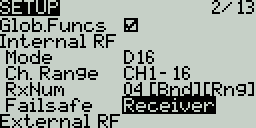
- Press ENTER
- Set the Throttle stick position to minimum, all the way down
- Supply power to the Rx
- Set the Tx Ailerons & Elevator stick to its desired position
- Press F/S on the Rx
- The green LED will flash on the Rx
Testing Failsafe
Video 9:12
- Remove the propeller
- Connect the Rx to the ESC throttle
- Supply power to the ESC and Rx
- Move the throttle up till the motor starts to turn
- Turn off the Tx
- The motor should stop
- The Ailerons & Elevator should go/stay in the desired position
Checking Control Surface Directions
Video 7:53
- Connect the Rx to the servos and ESC throttle
- Remove the propeller
- Turn on the Tx
- Verify the the model that is bound to that Rx is what is seen on the main view
- Supply power to the ESC and Rx
- Check the control surface direction of movement as you move the Tx sticks one surface at a time
Changing Control Surface Directions
Video 8:22
- From the main view press MENU
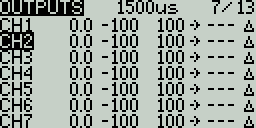
- Press PAGE repeatedly till the OUTPUTS screen is displayed
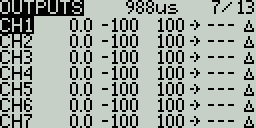
- Turn the knob clockwise till the desired channel is selected
The desired channel is the one that controls the surface moving in the wrong direction
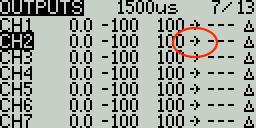
- Press ENTER
- Turn the knob till the Direction field is selected
At the time of producing these instructions the screens are under going changes
One of these screens will appear
OR
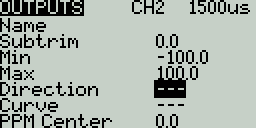
- Press ENTER

OR

- Press EXIT
- Test the direction of the control surfaces again
Range Check
Video 9:30
From the Taranis Q X7 Manual

- From the main view press MENU
- Press PAGE
- Turn the knob clockwise till [Rng] is selected
- Press ENTER
- Take the Tx to at least 1/30th the distance of which you expect to fly the model away from you
- Move the control surfaces and ensure you have control of the model
- If safe to do so move the throttle stick up till the propeller turns, move it back down
First Flight
You are now ready to try out the Tx on your first flight. Please take all the safety precautions you would normally take.