OpenTX Lua Telemetry Scripts
Contents
What Is A Telemetry script
- Access telemetry data
- Displays customized telemetry screens
- Process telemetry data (telemetry calculations)
- Up to 3 active scripts per model
- Selected from the telemetry screen settings
- Can be used by different models (with caution)
- Can be used to display non-telemetry data such a the Tx timer
- Telemetry scripts are also know as LCD and background scripts because they are placed in the TELEMETRY folder and may or may not
- Use telemetry information
- Display on the LCD screen
- Run in the background
OpenTX Firmware
- All versions of the OpenTX firmware that run on FrSKY transmitters have telemetry scripts enabled
- The Lua build option is not required

Telemetry Script File Location
- Transmitter
SD Card copy on your computer > /SCRIPTS/TELEMETRY/<name>.lua

- <name> 6 or less characters plus .lua
Telemetry Available
- Companion > Open a model that has Telemetry from the receiver
- Select the Telemetry tab
- Take note of the sensor names
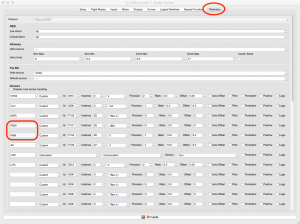
- For this example we will use RxBt
Sample Script Setup
- Download these files
- Place the .otx file anywhere on your computer
- Place the .lua in SD Card copy on your computer > /SCRIPTS/TELEMETRY/
and on the transmitter SD Card > /SCRIPTS/TELEMETRY/

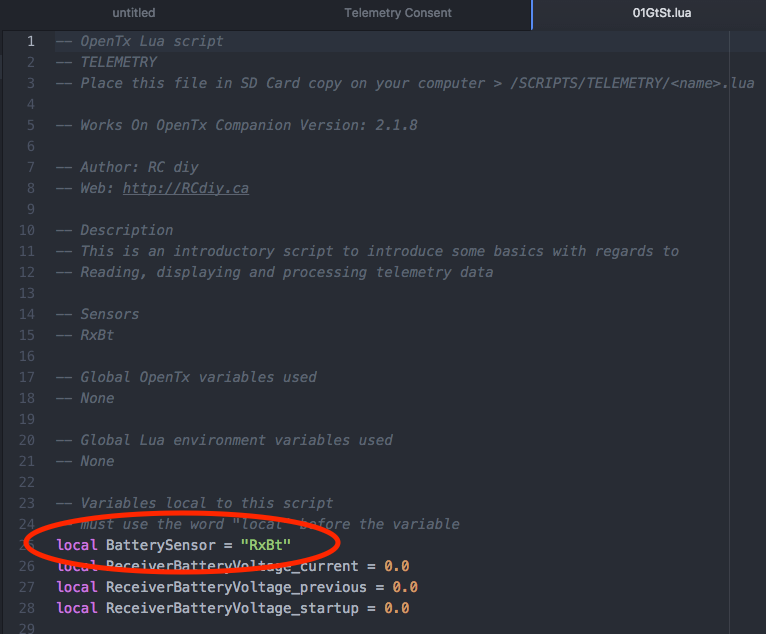
- Open the file in a text editor to review the default settings and edit it as required. In this example we will check that the script is using “RxBt”.
Add A Lua Script To Telemetry Screen
- Companion > Open a model that has Telemetry
- Select the “Telemetry” tab
- Scroll to the bottom and select a “Telemetry screen”
- “Custom Screen Type” select “Script” and then “RxBt”
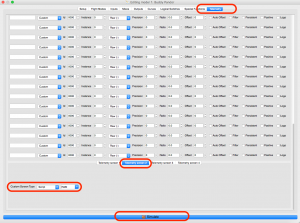
- If “RxBt” is not present close model editing window and open it up again.
Running & Testing A Lua Script In Companion
- Companion > Select a model that has telemetry
- Right Click > Select “Simulate”
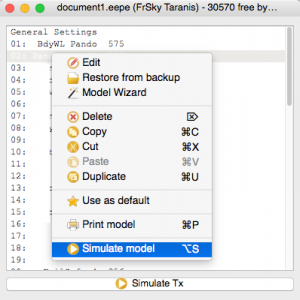
- Select “Taranis Simulator” (or your Tx equivalent)
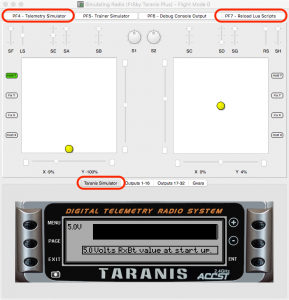
- Long press PAGE
- If you don’t see the screen with the new script output press PAGE briefly, repeat till you do.

- Select “P4 – Telemetry Simulator”
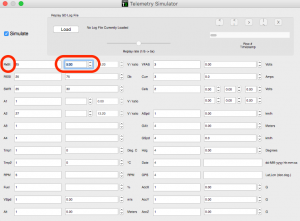
- Locate “RxBt” and then the box near it that has the value being displayed on the telemetry screen. Change the value and watch the screen change.
Running The Script On The Tx
- Write models and settings to the transmitter
- Start up the Tx and aircraft like you usually would
- Long press PAGE
- If you don’t see the screen with the new script output press PAGE briefly, repeat till you do.

Credits
